
Kapla model: robot with outstretched arms
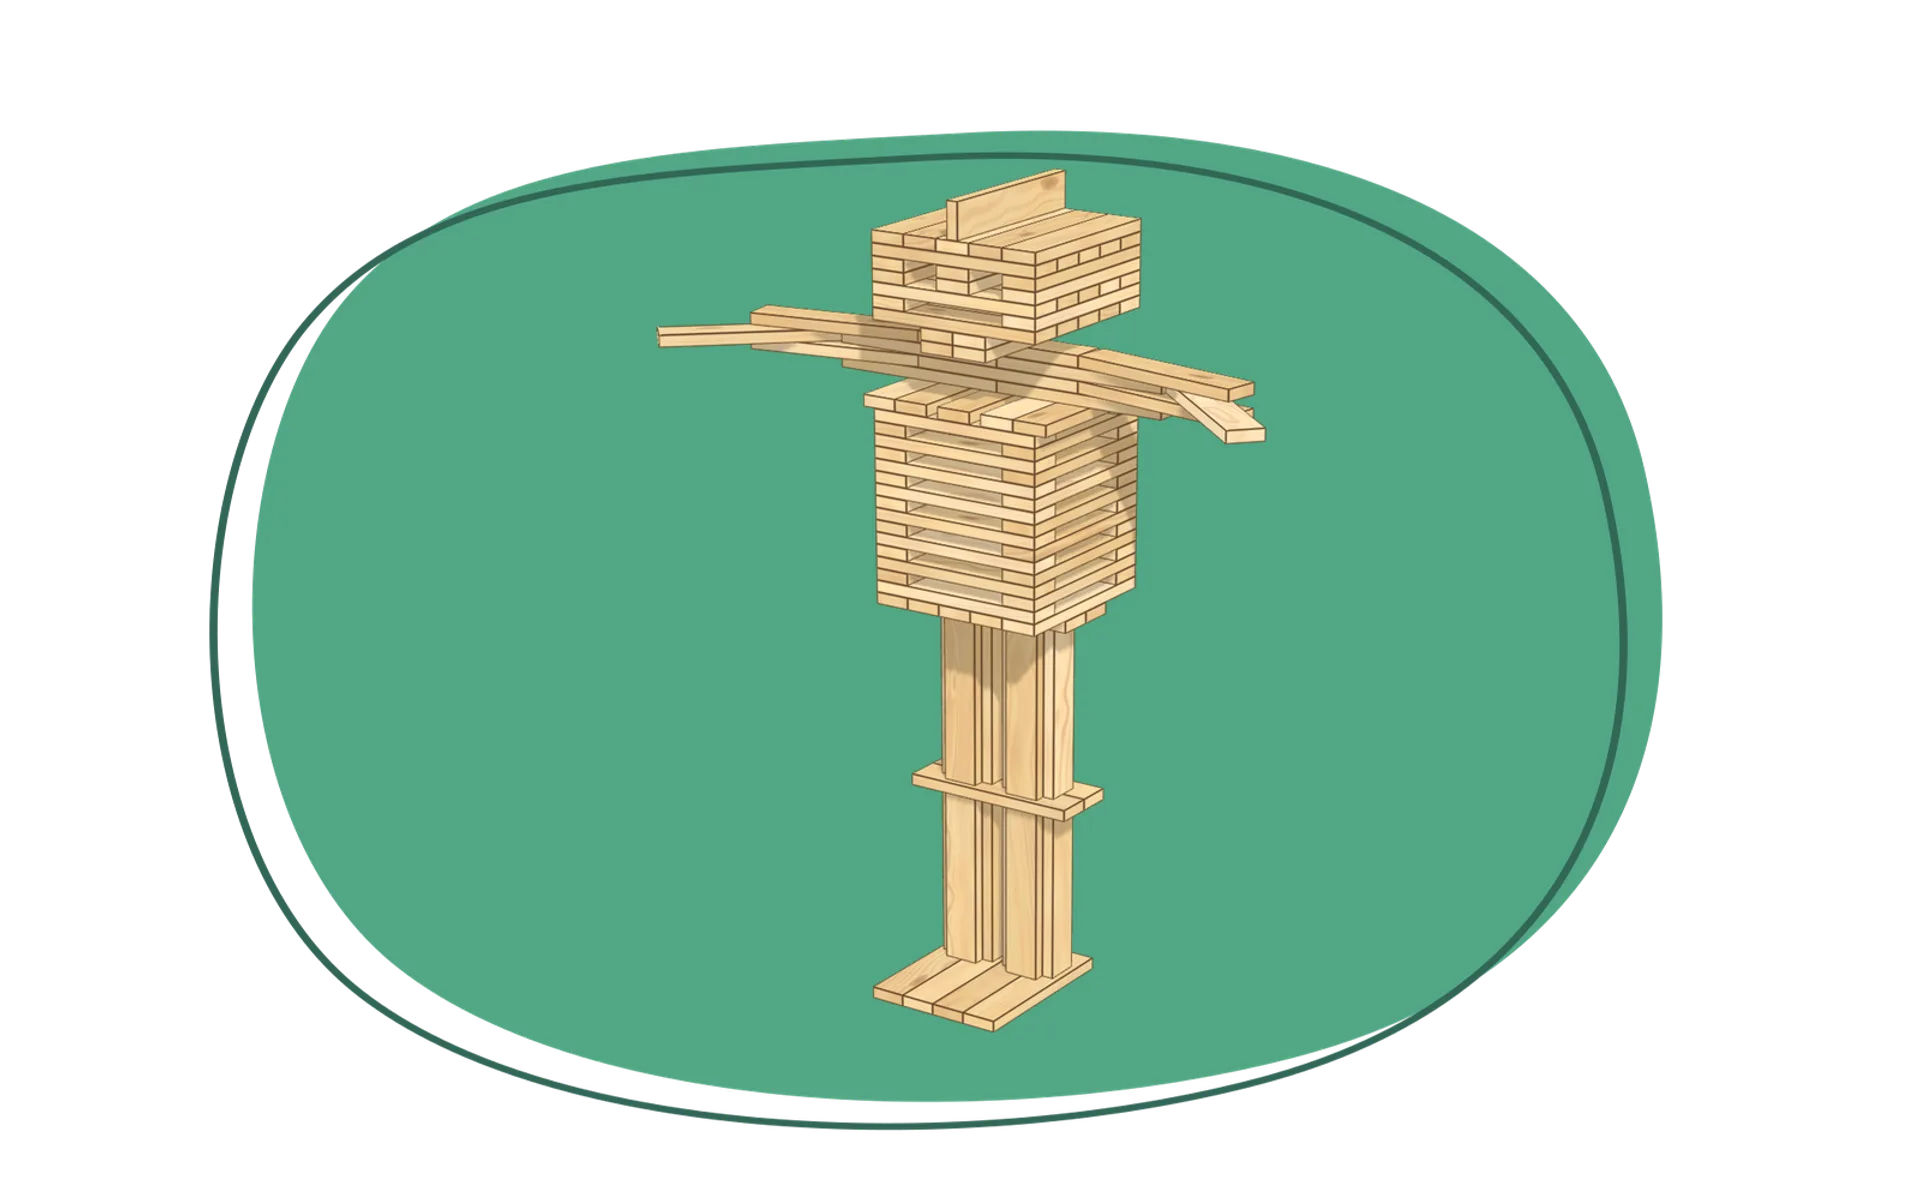
Pieces
Difficulty
Time
Age from
Dimension
Shared by
Build the Kapla robot step by step
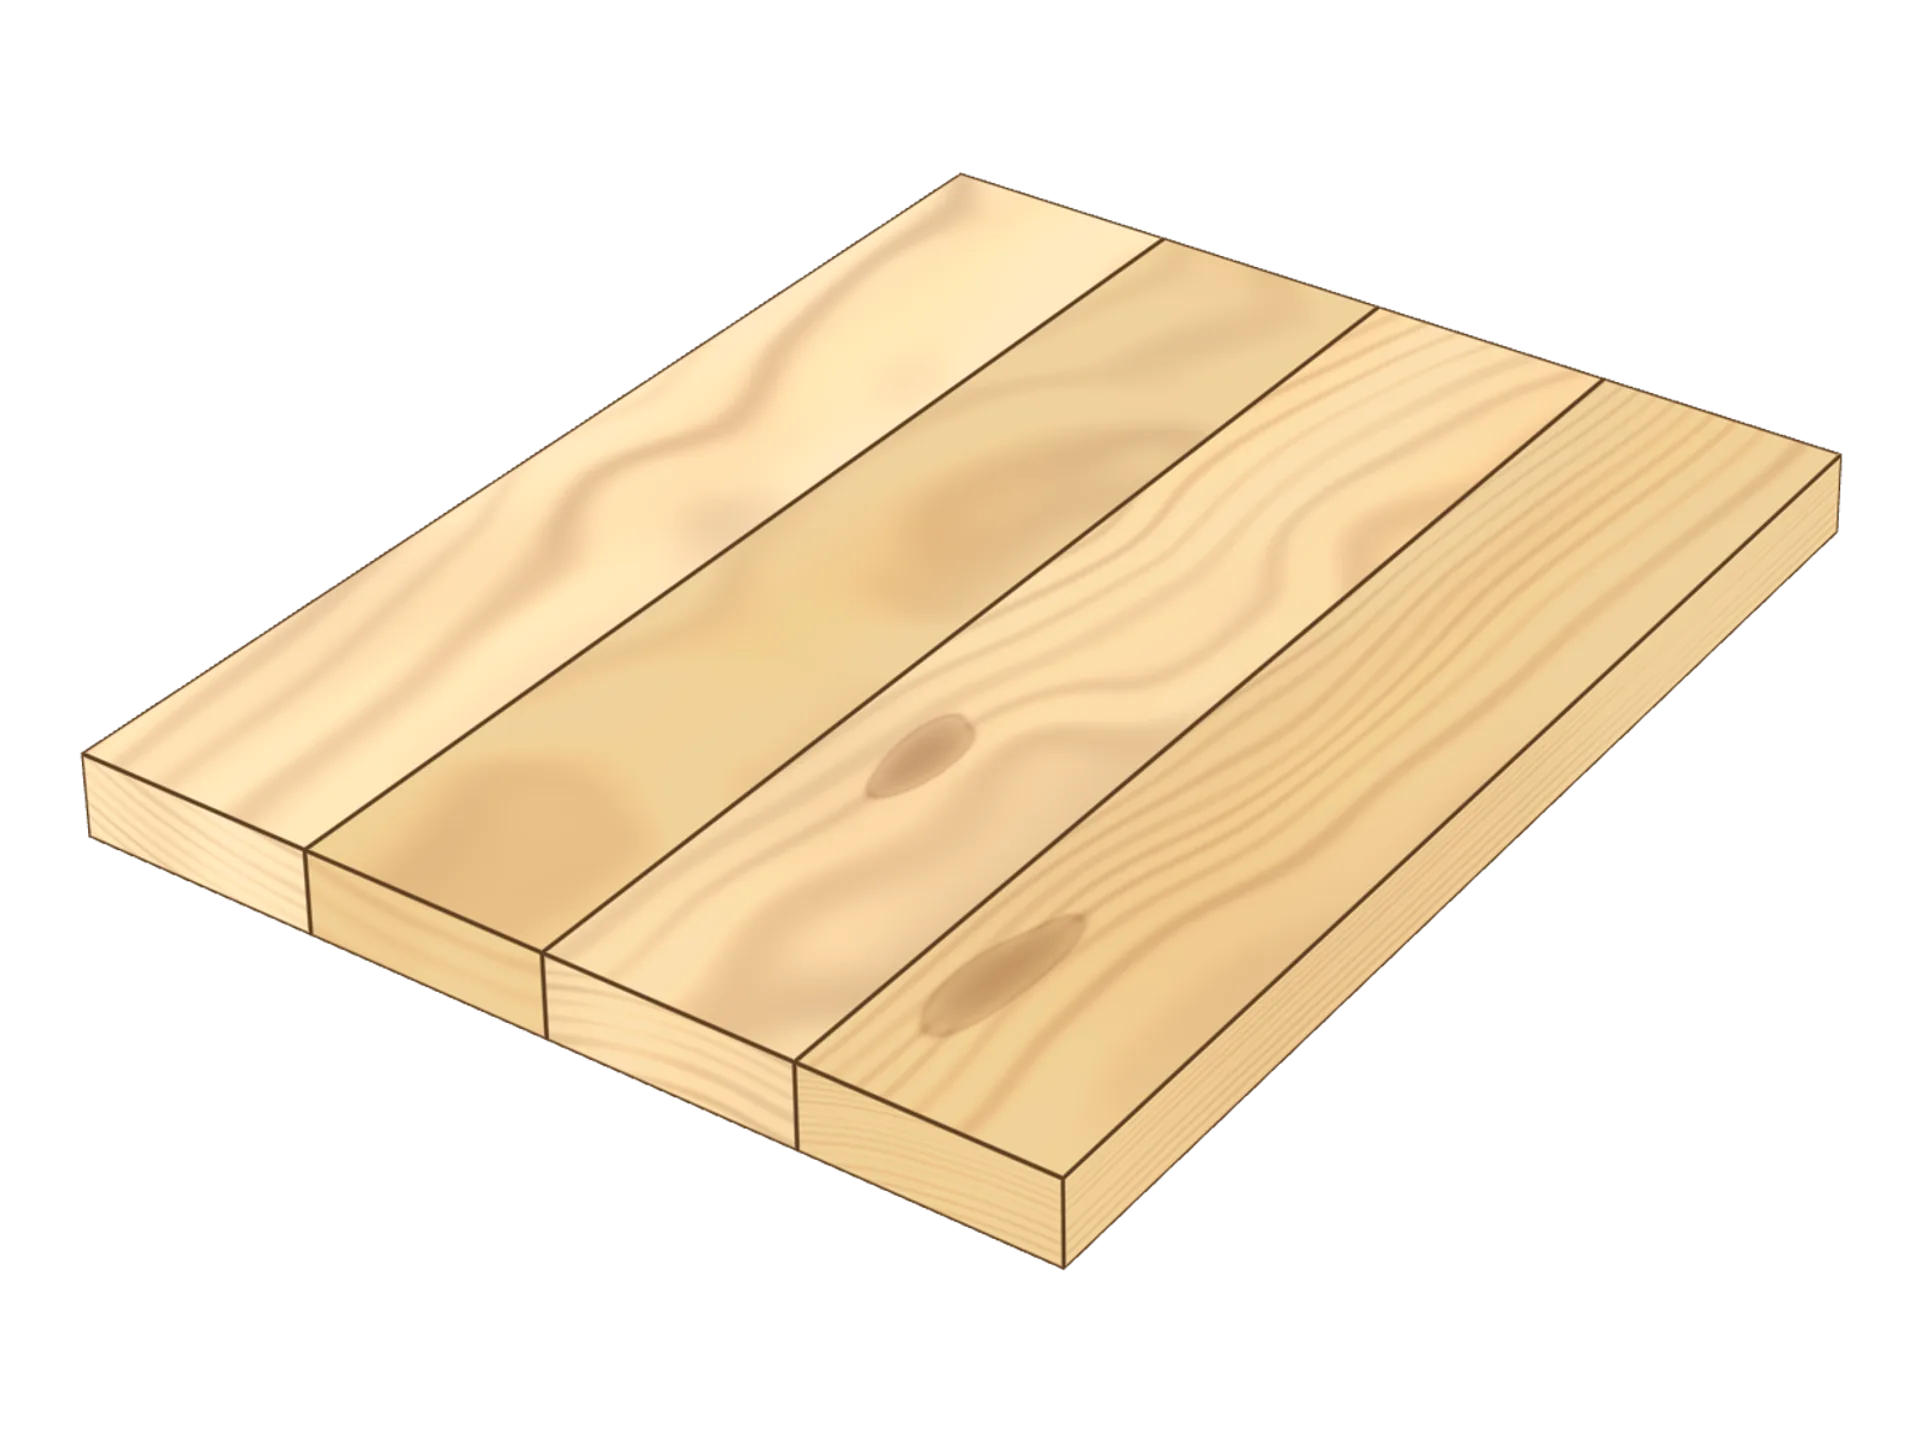
Step 1: lay the feet
Lay 4 planks flat side by side, pointing forward: these are the robot’s feet. The legs will stand on their back end, with the toes out in front.
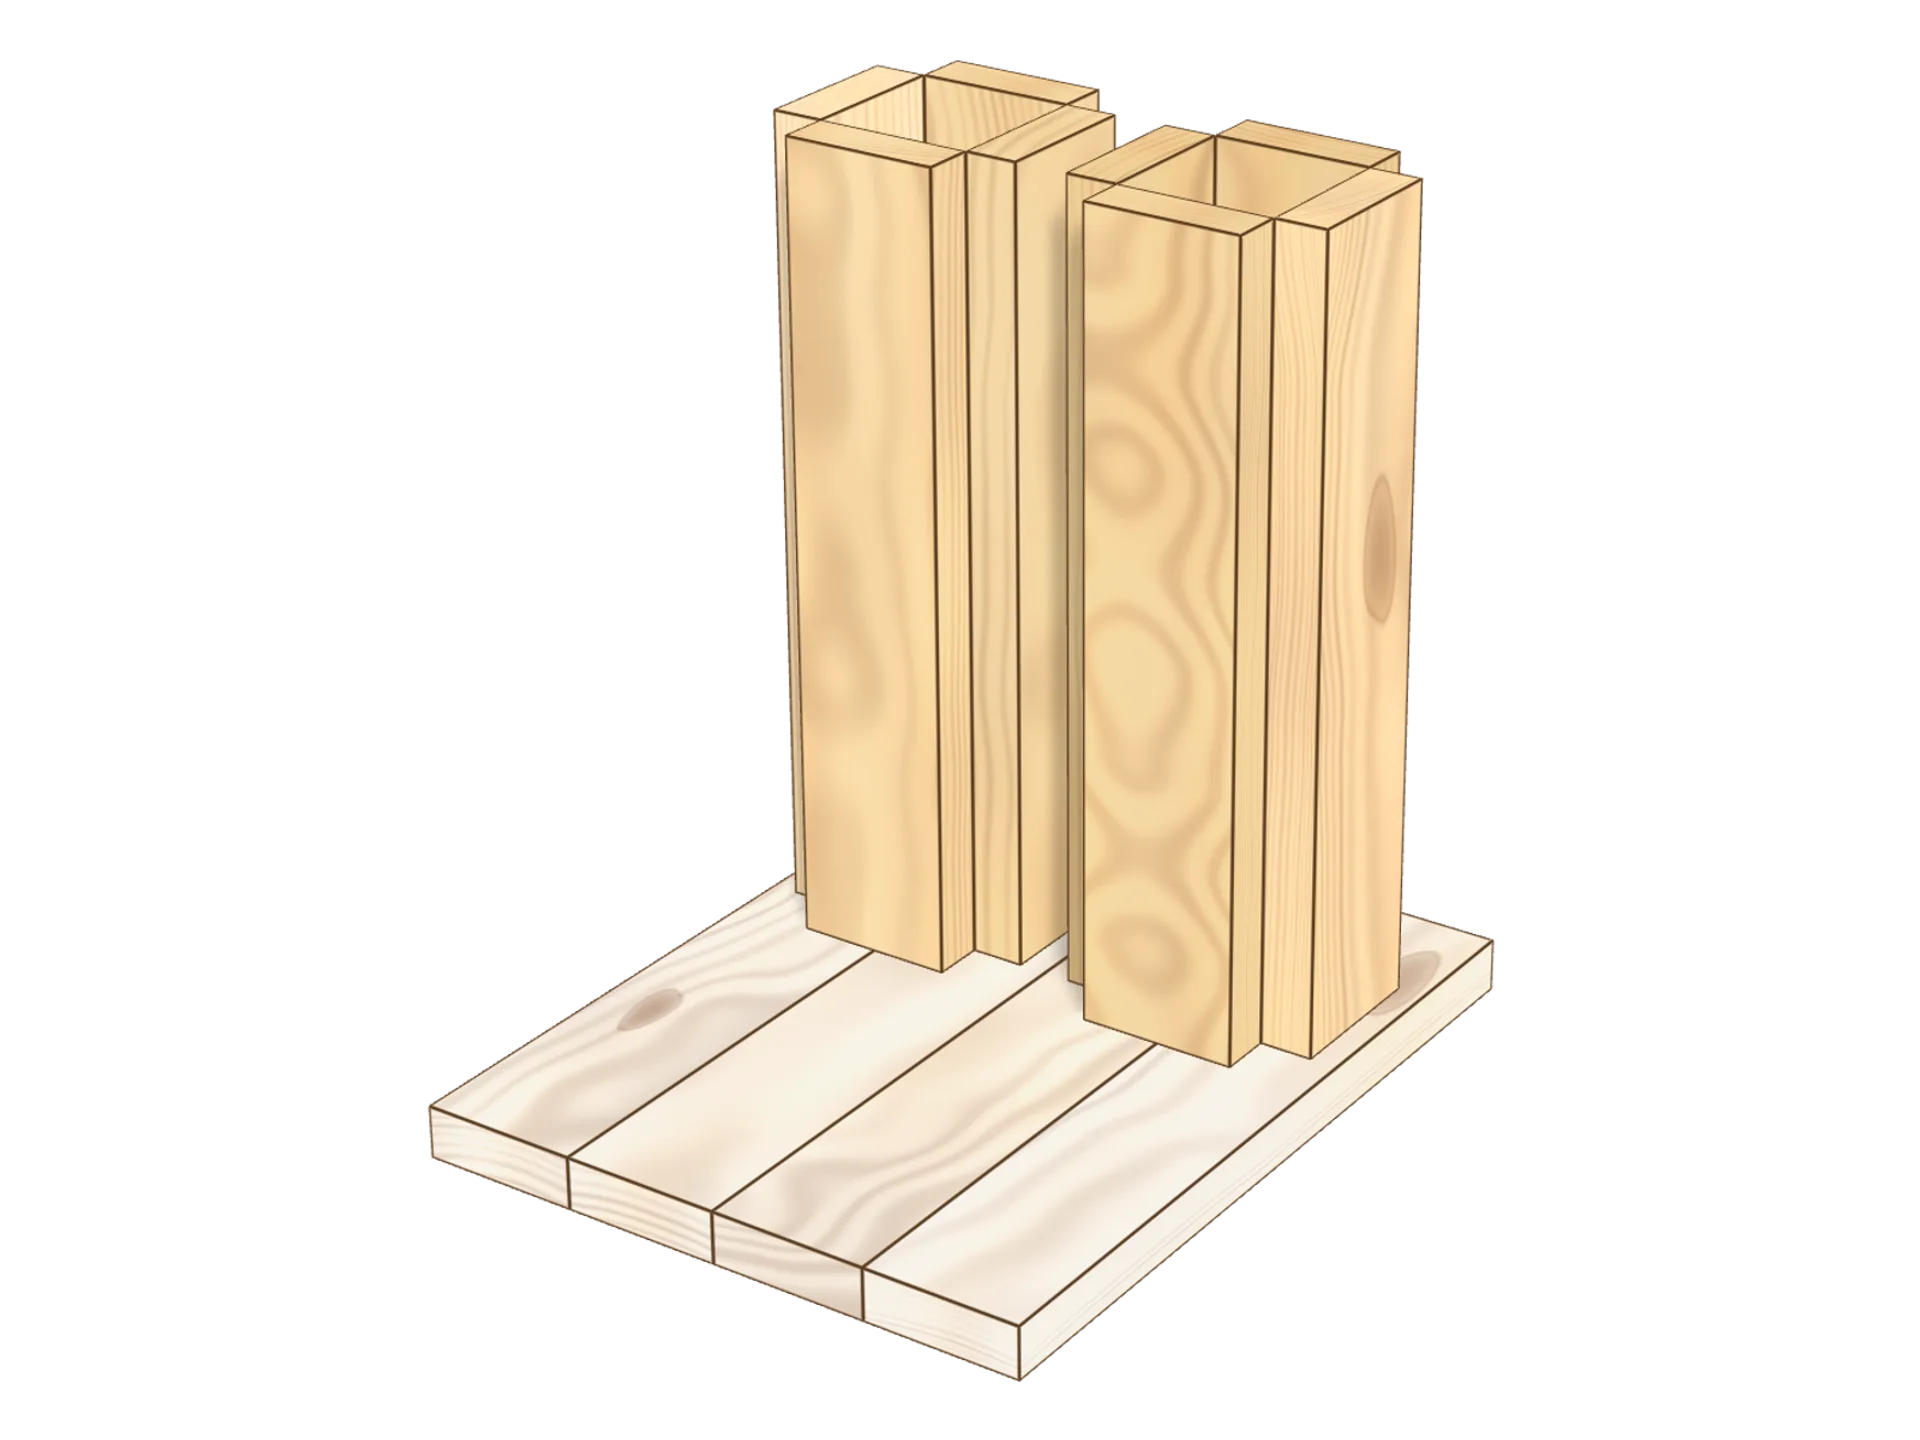
Step 2: build the lower legs
On each half of the feet, stand 4 Kapla upright in a small square: it is a tube, the bottom of a leg. Make 2 of them, one per foot.
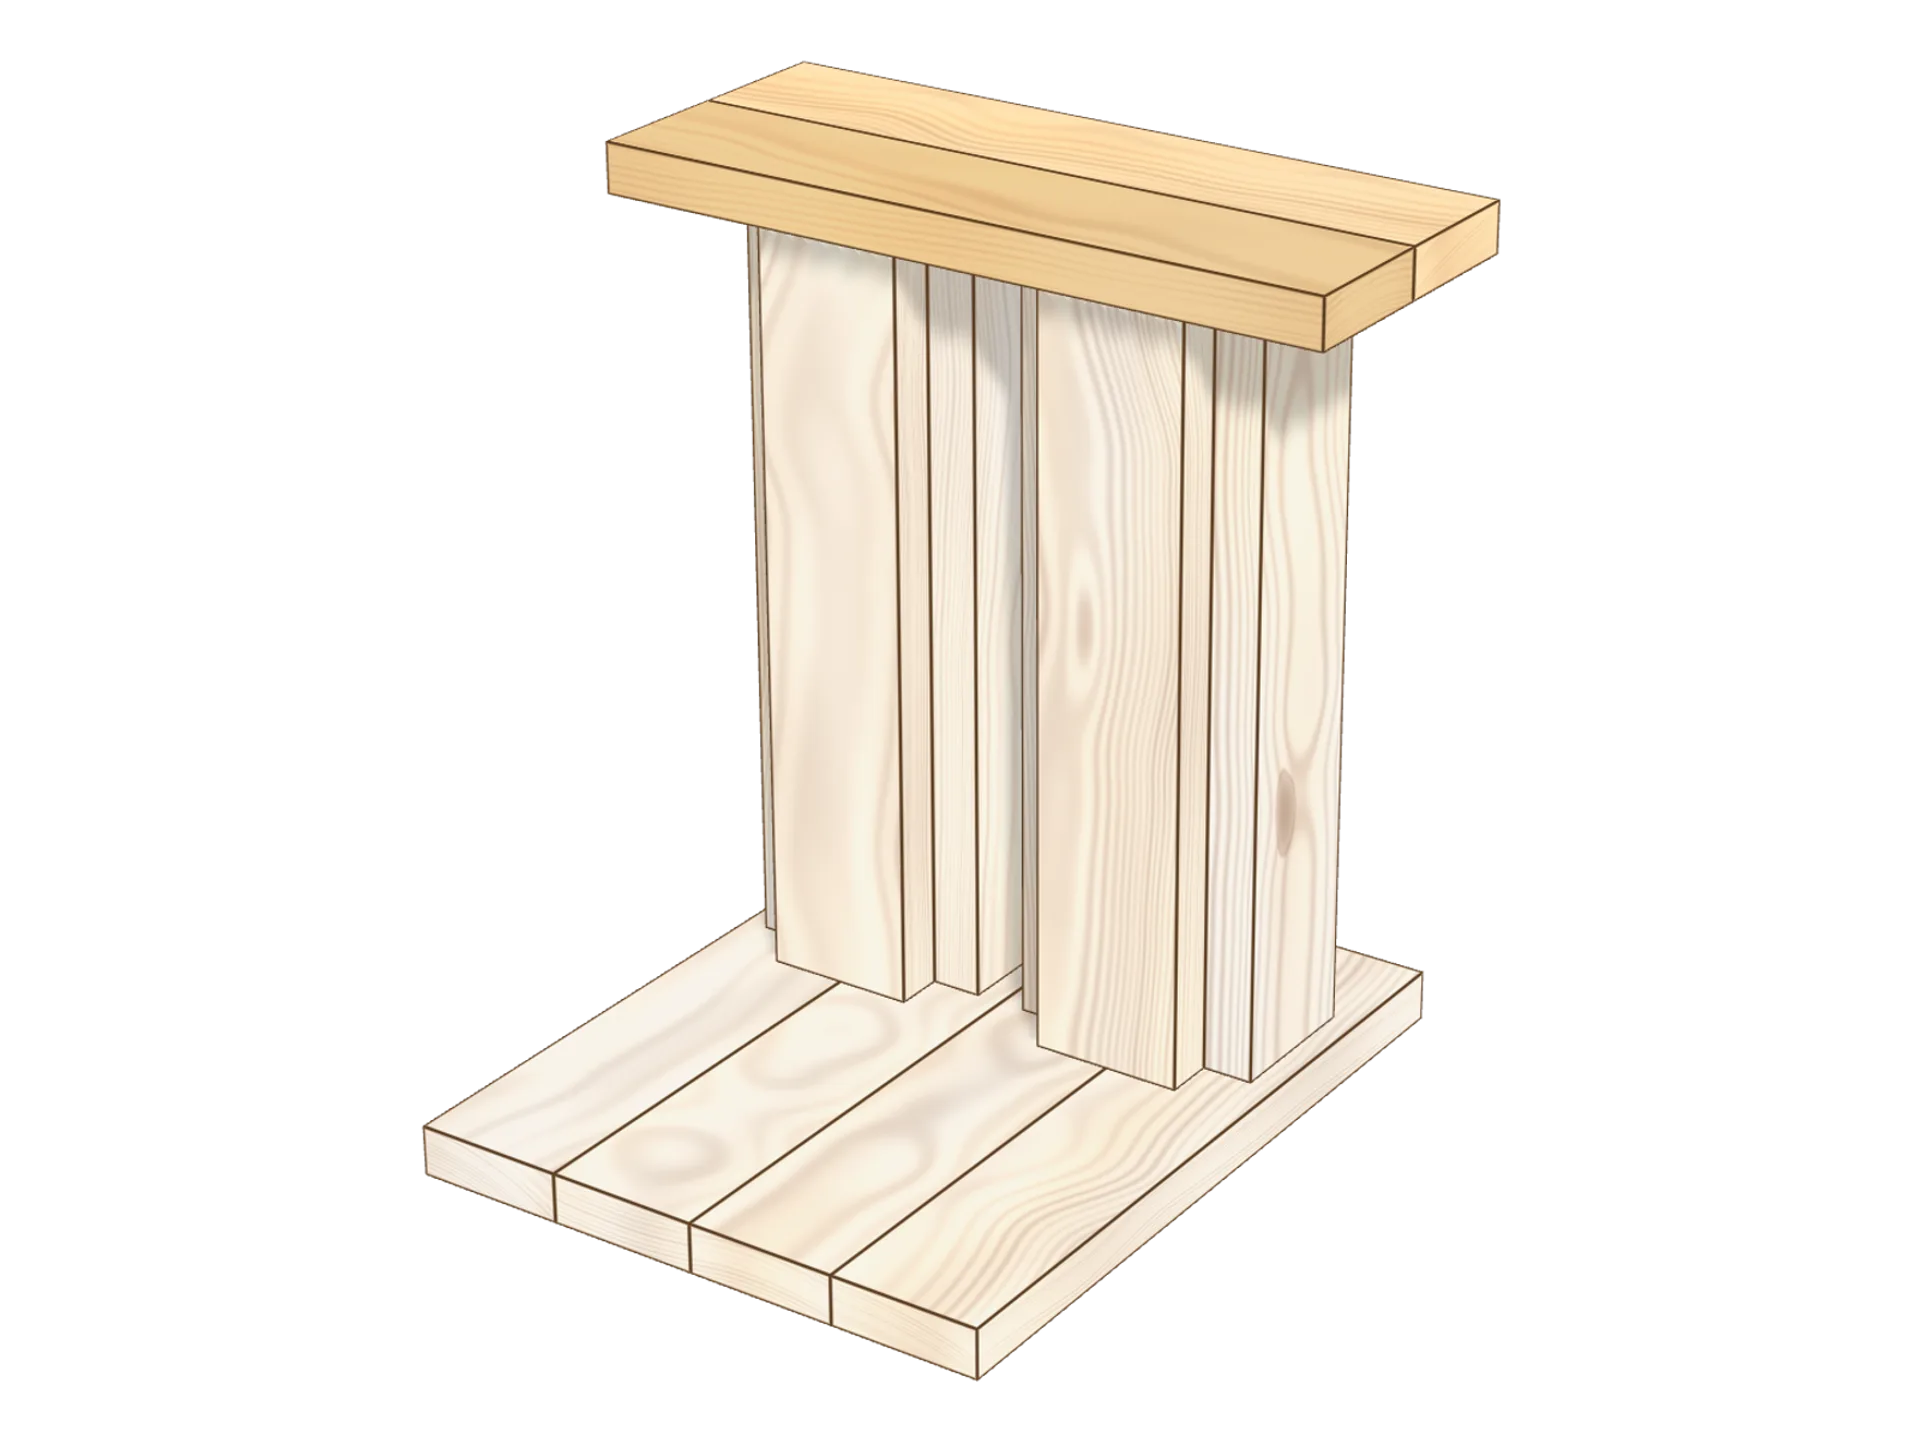
Step 3: join the legs
Lay 2 planks flat across both tubes: they join the legs and make the floor for the next tube.
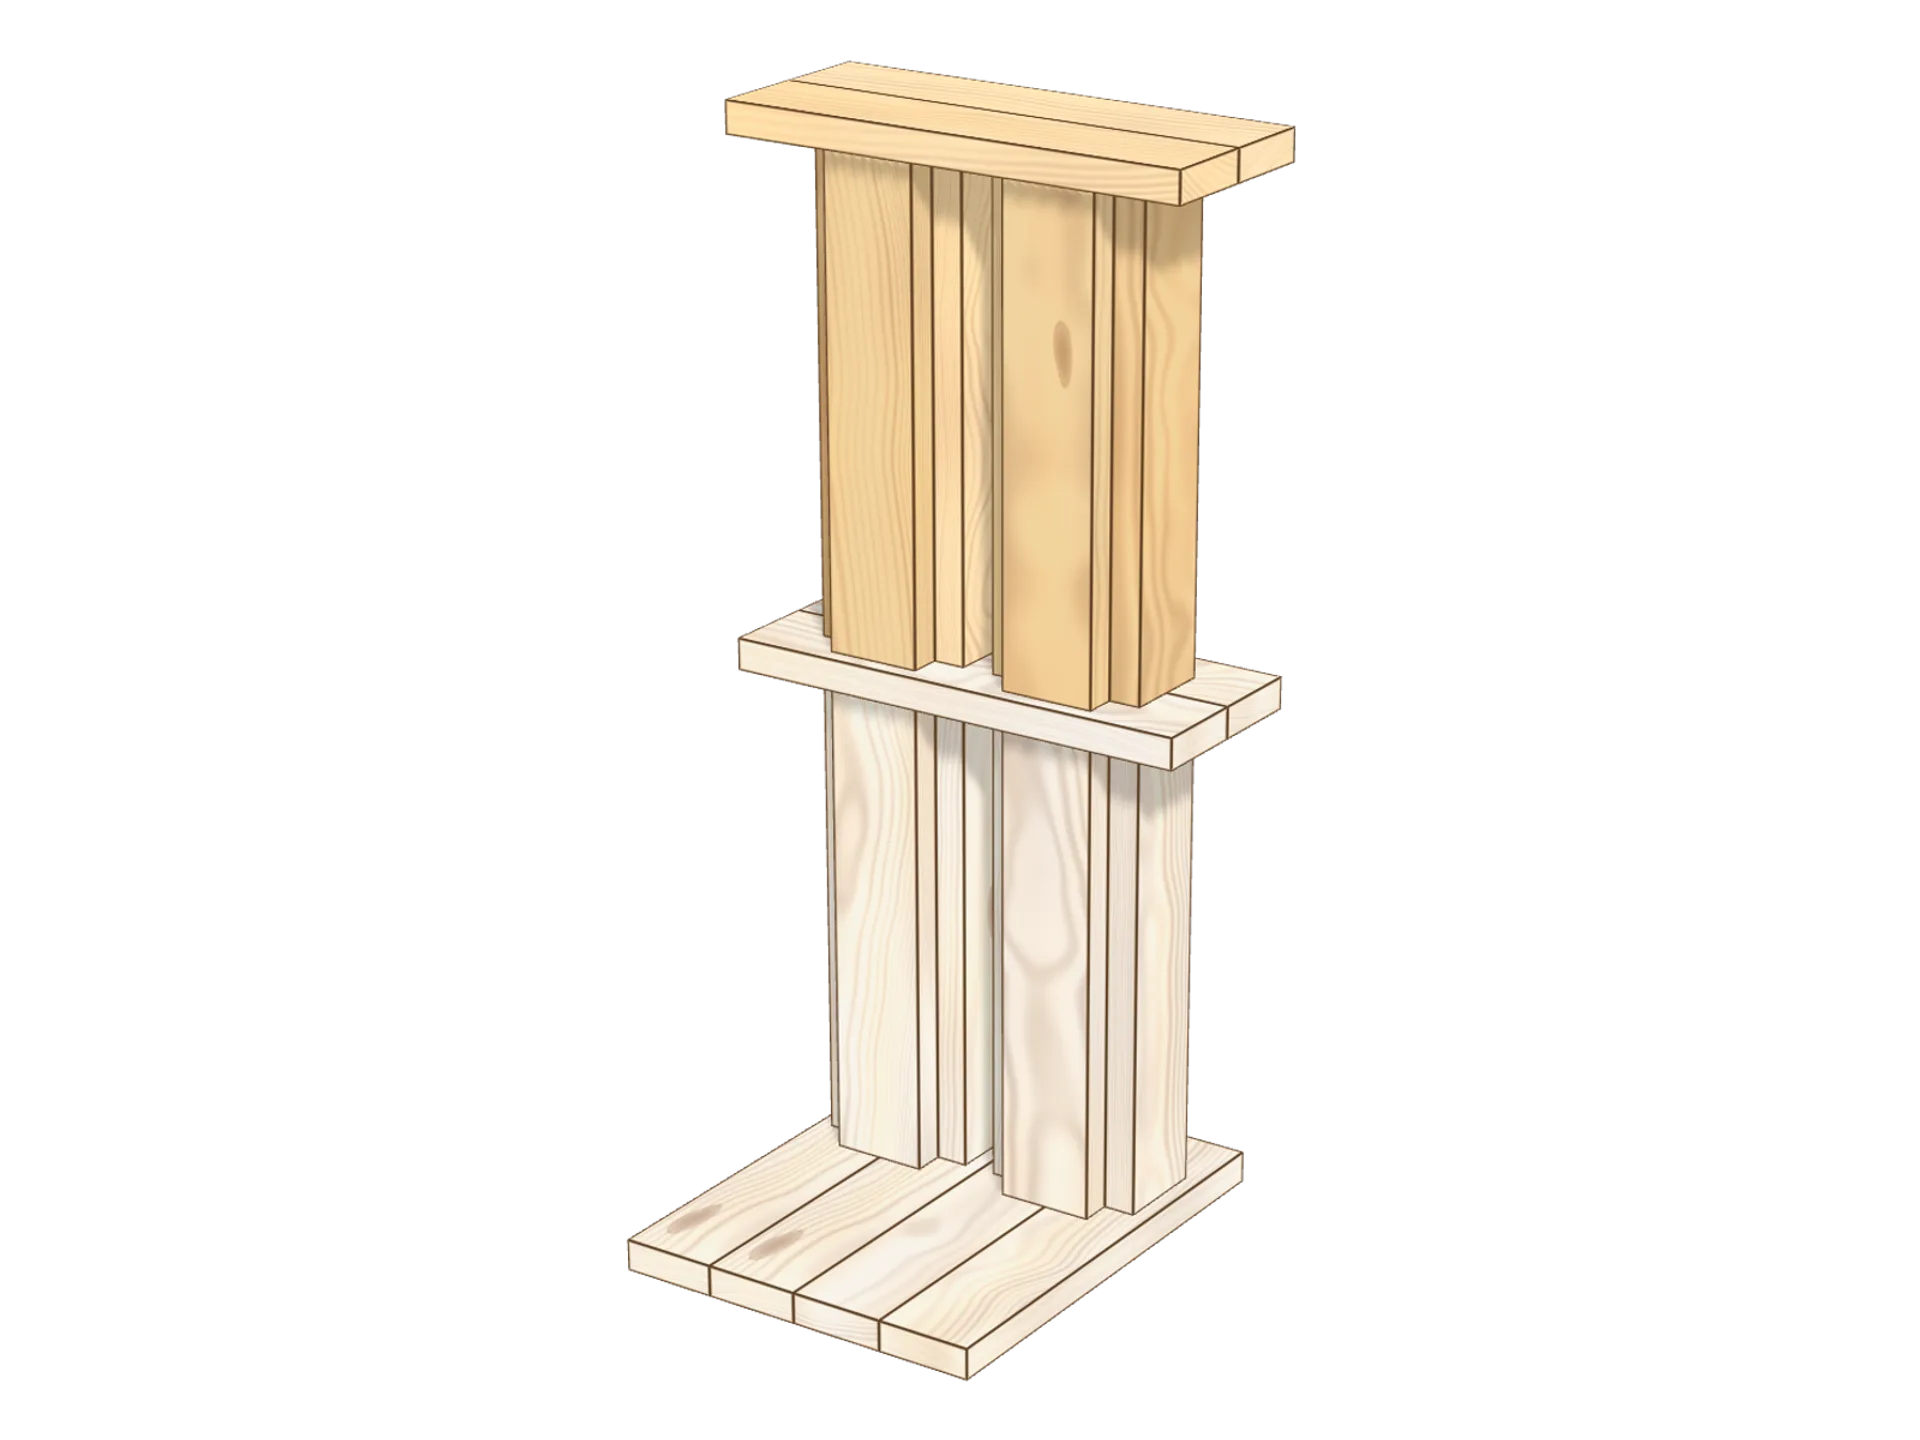
Step 4: build the upper legs
Make 2 more tubes of 4 standing Kapla just above, then cover them with 2 flat planks. The robot’s legs are done.
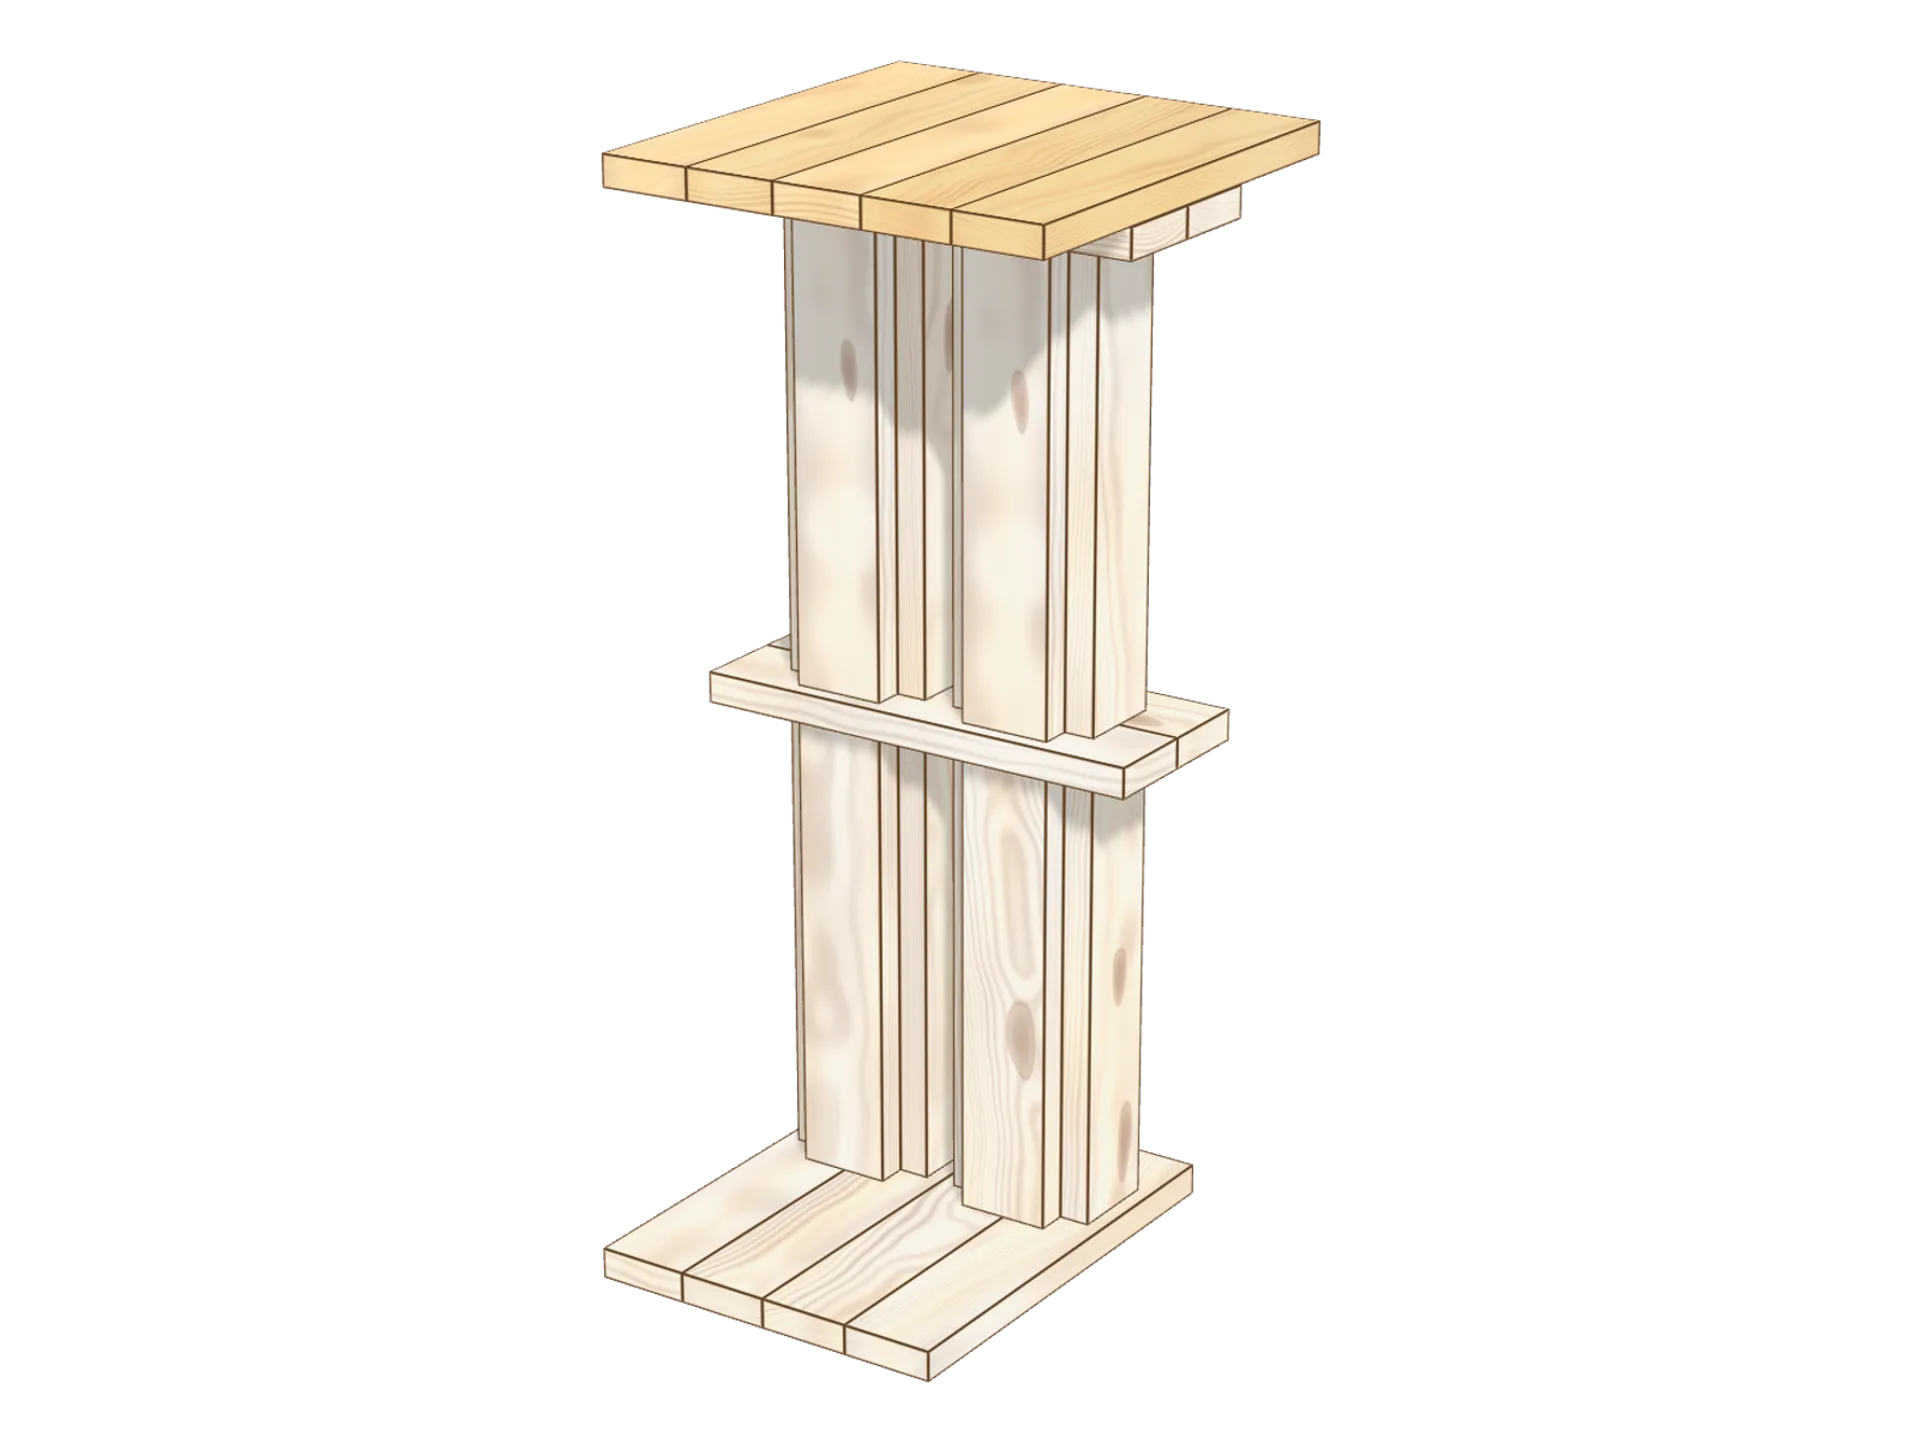
Step 5: the hips
Lay 5 planks flat side by side across the legs: these are the hips, the floor the body will stand on.
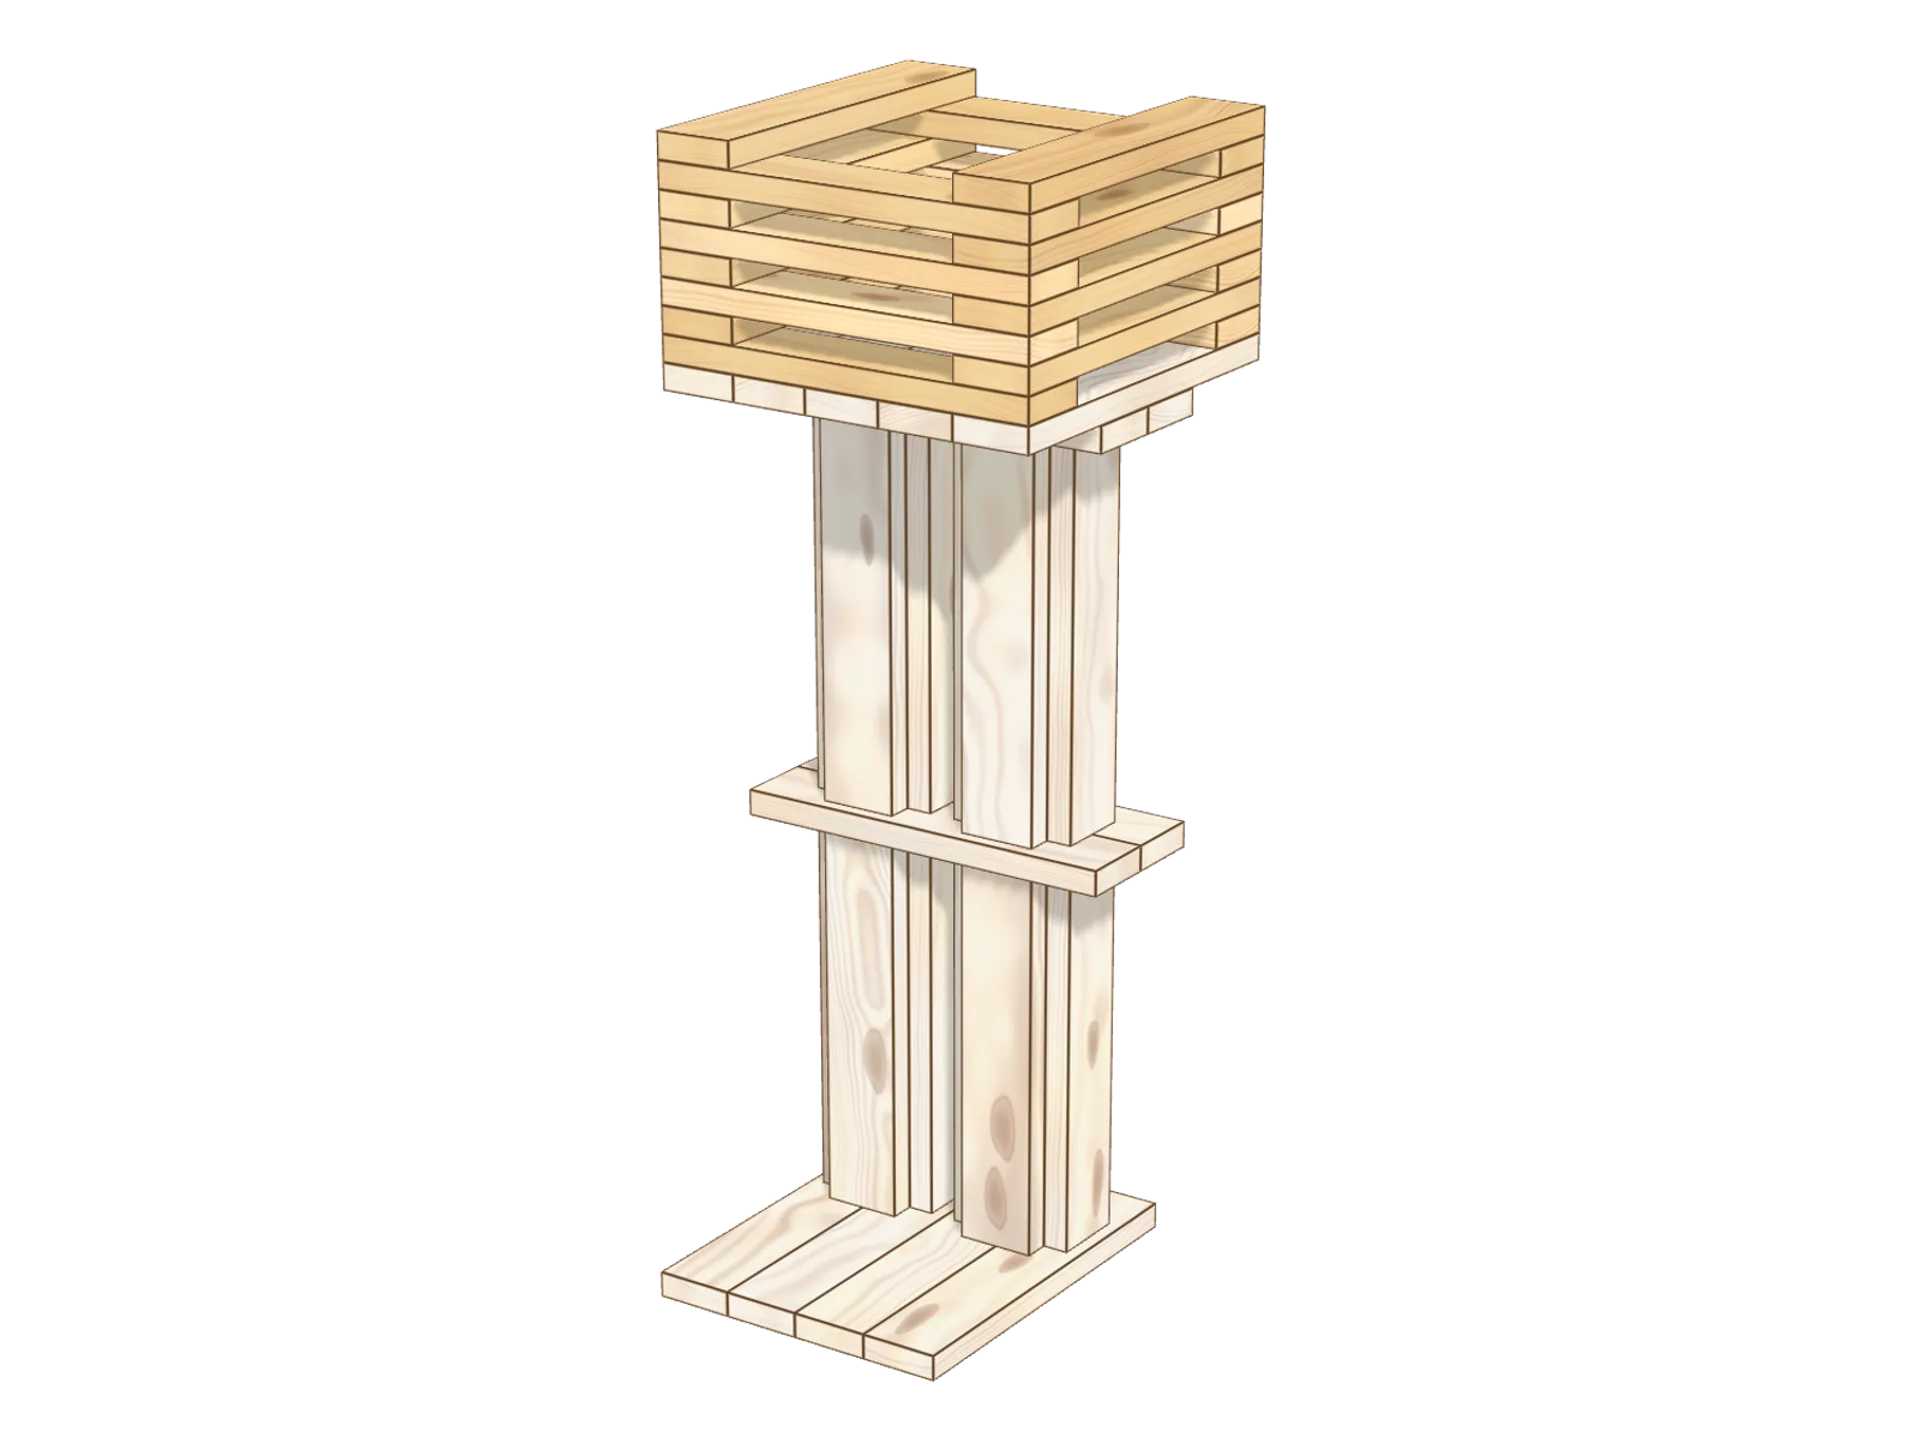
Step 6: build the body tower
Lay 2 planks flat on the hips, one at the front and one at the back, then 2 on top along the sides. Cross every row like this, as in a Kapla Tower, and build 8 rows.
💡 Tip: line up the ends at every row: the tower stays straight.
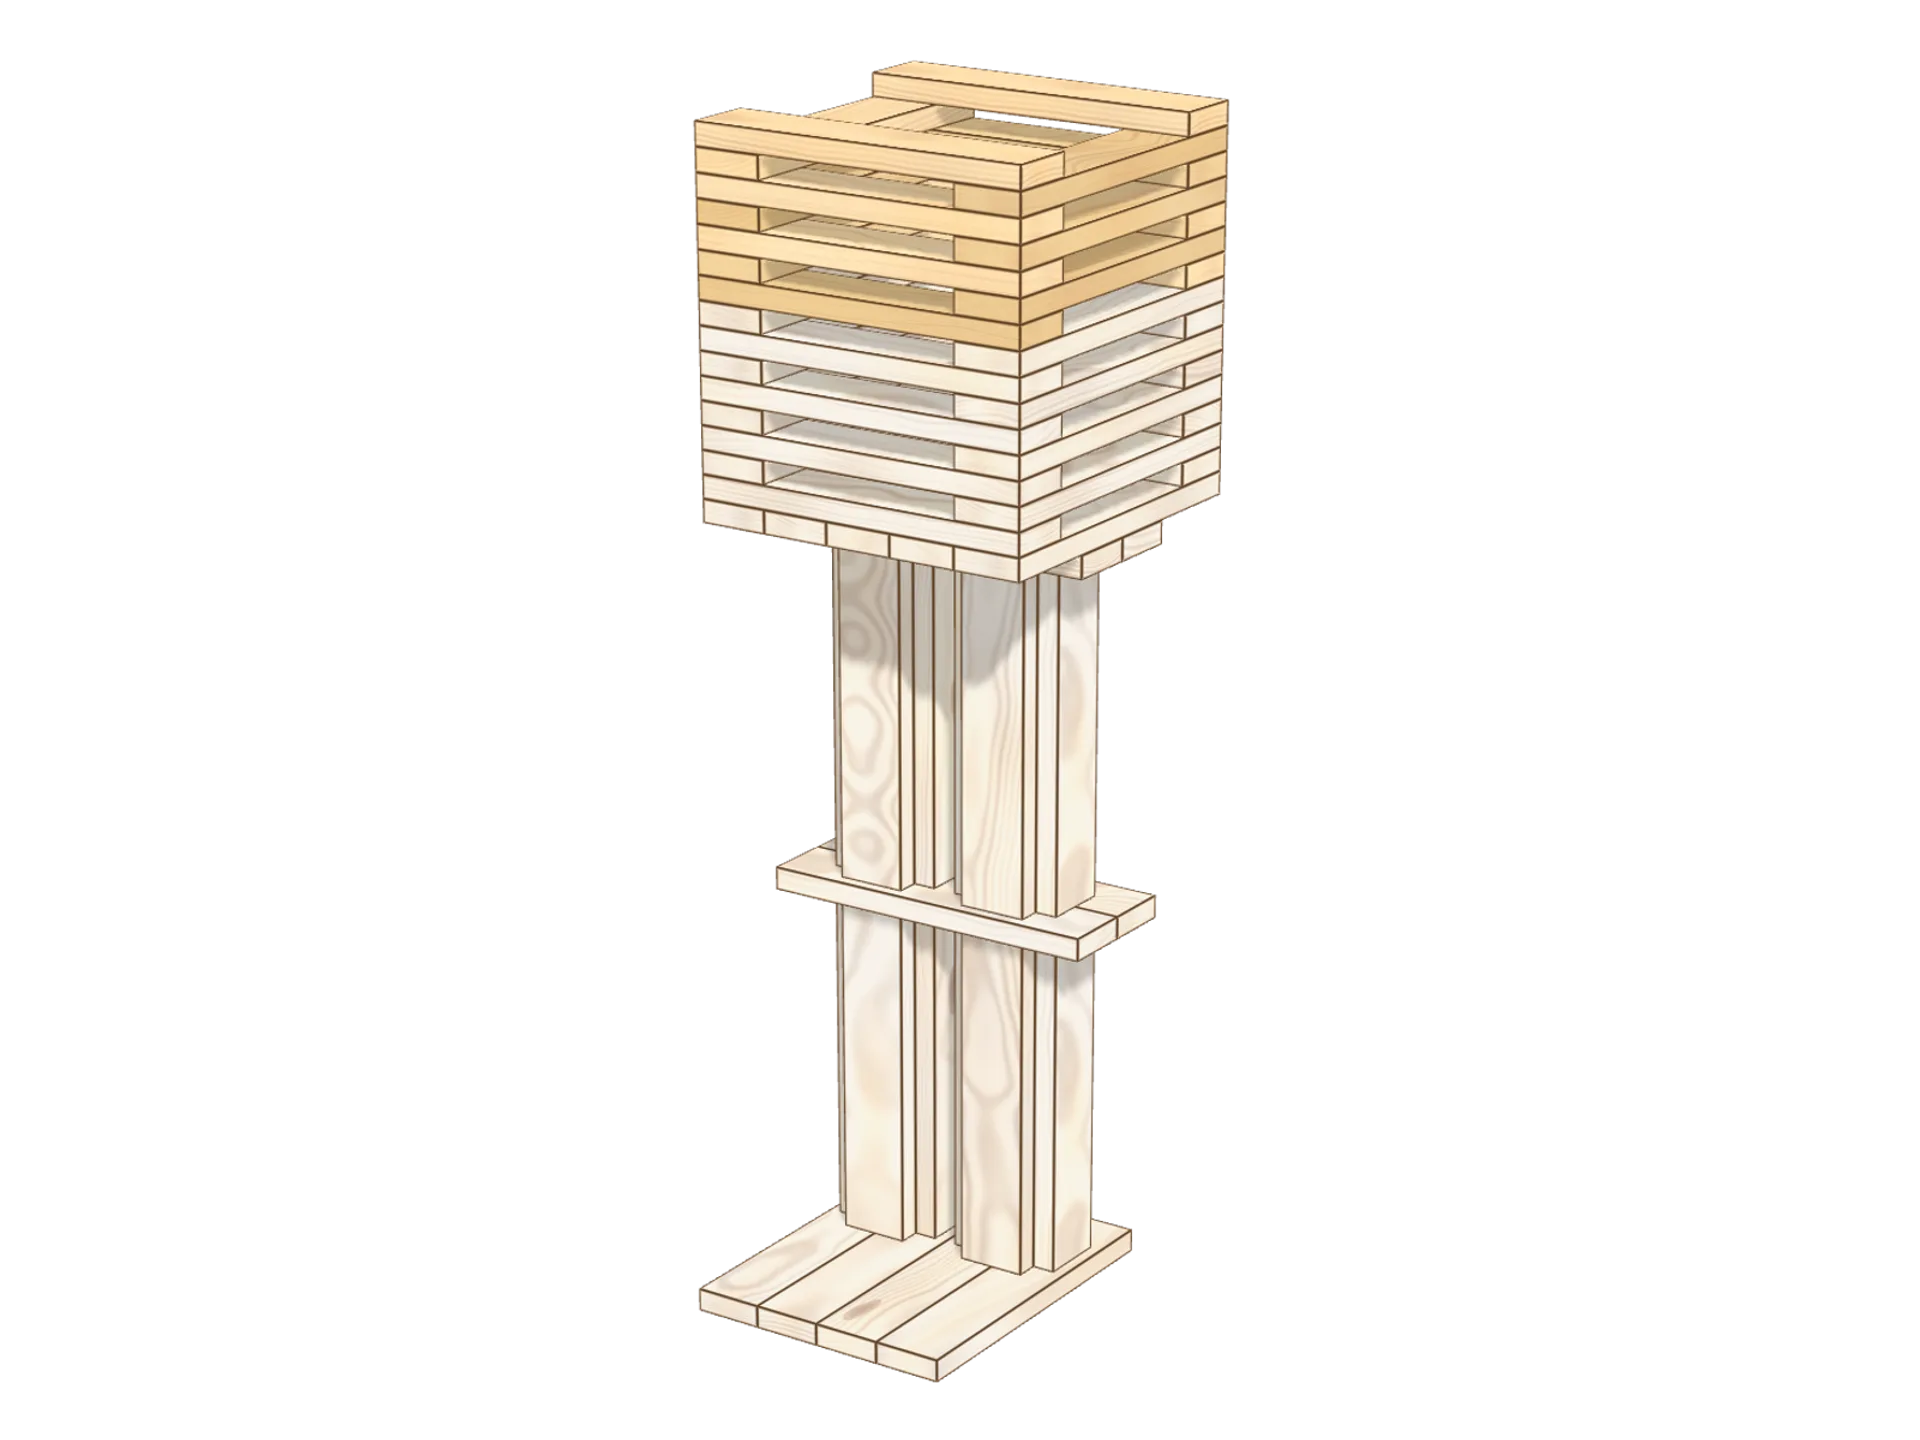
Step 7: finish the body
Build 7 more crossed rows, ending with a front-and-back row. The robot’s body is done, hollow like a box.
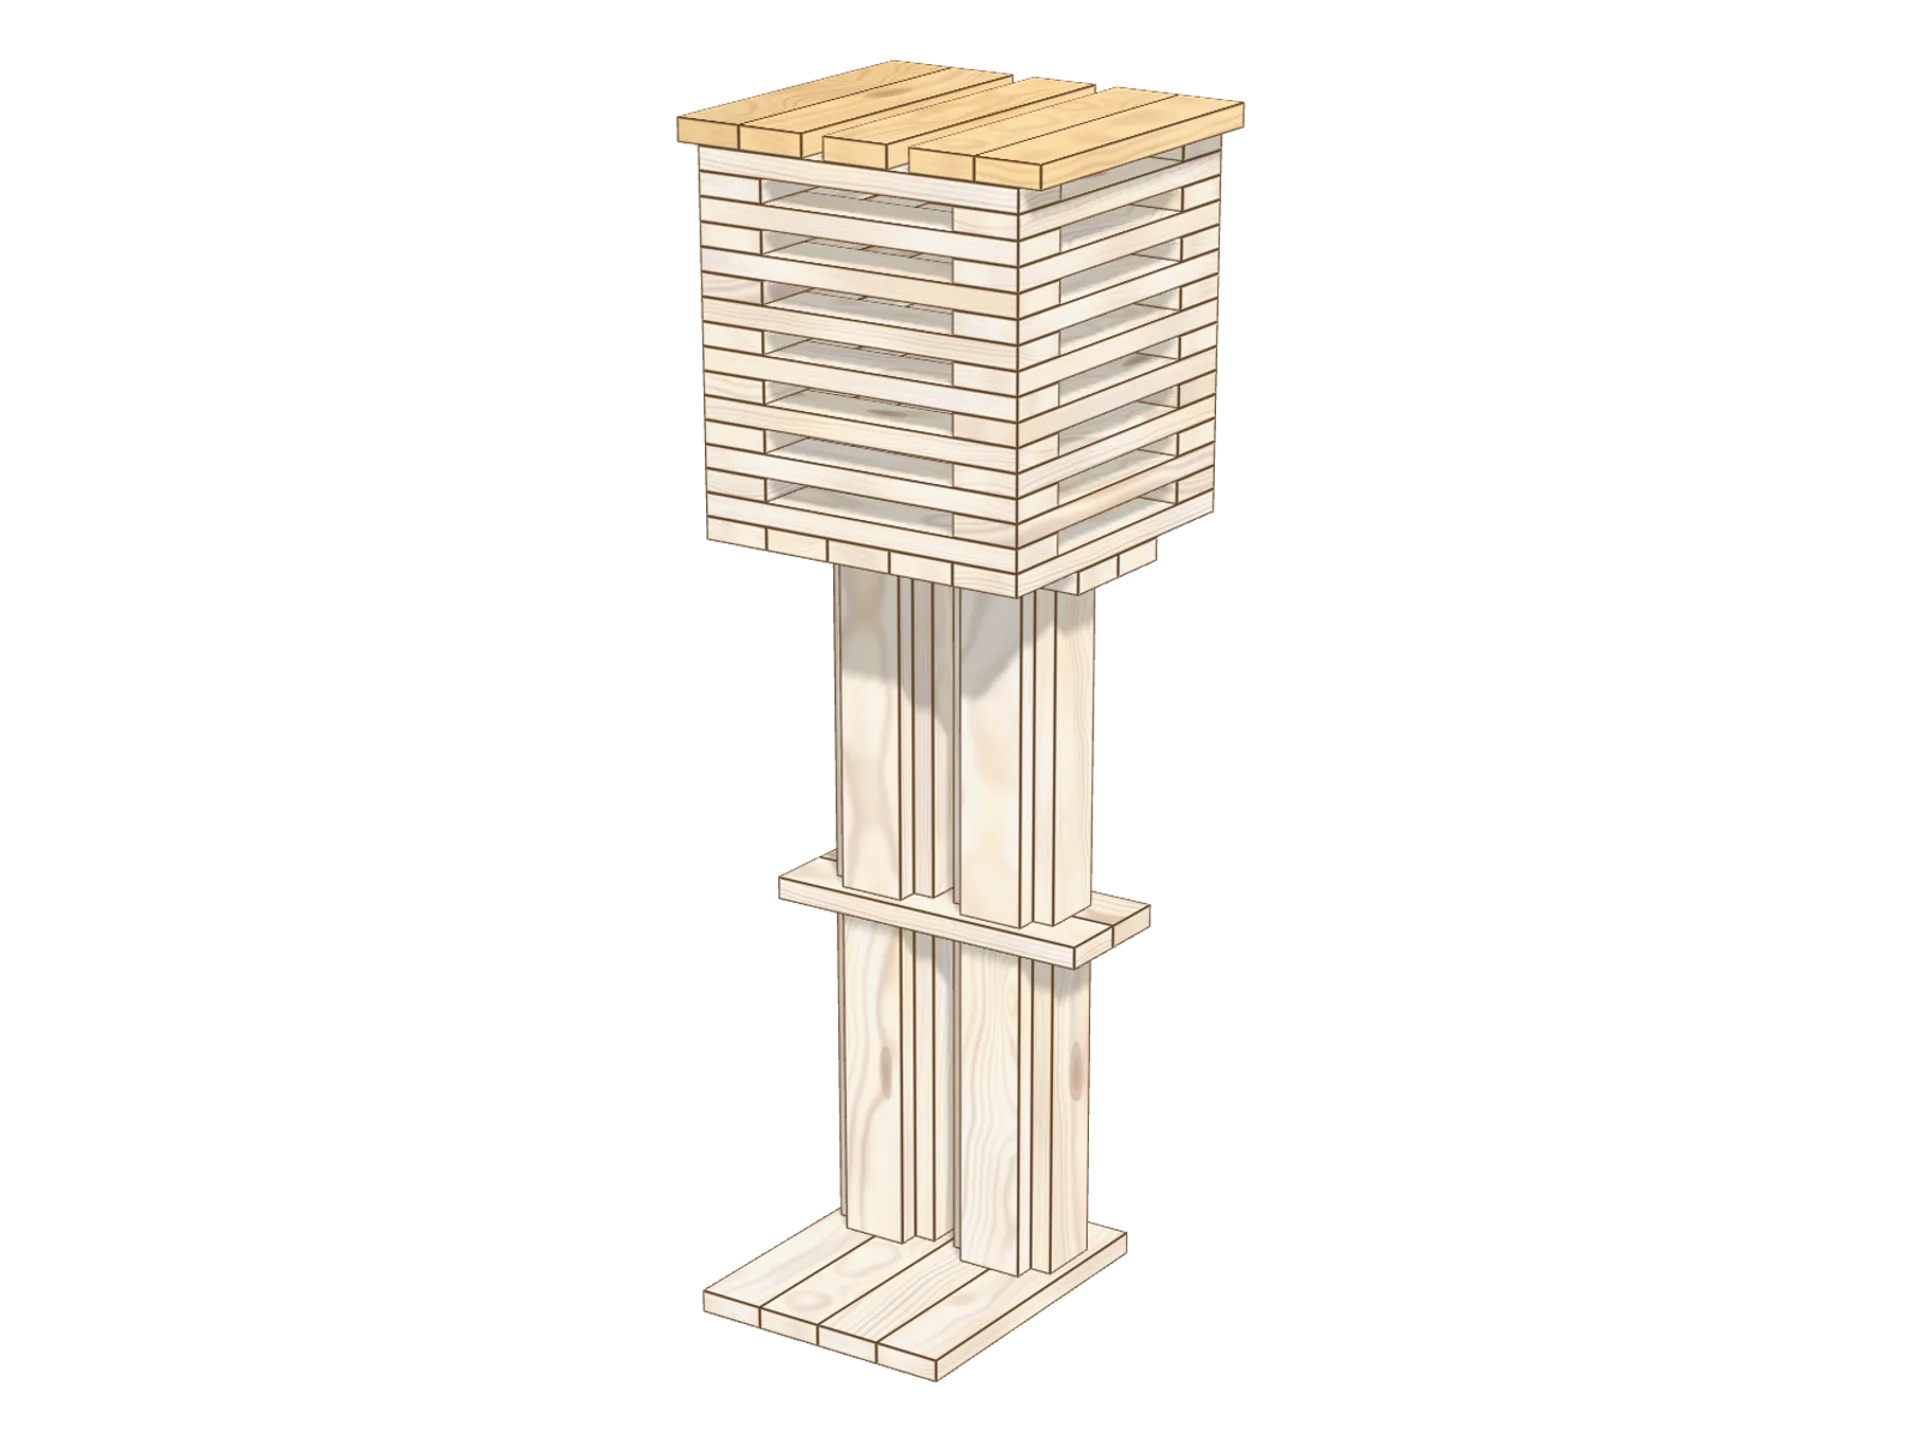
Step 8: the shoulders
Close the top of the body with 5 flat Kapla. This floor is the shoulders, which will carry the arms.
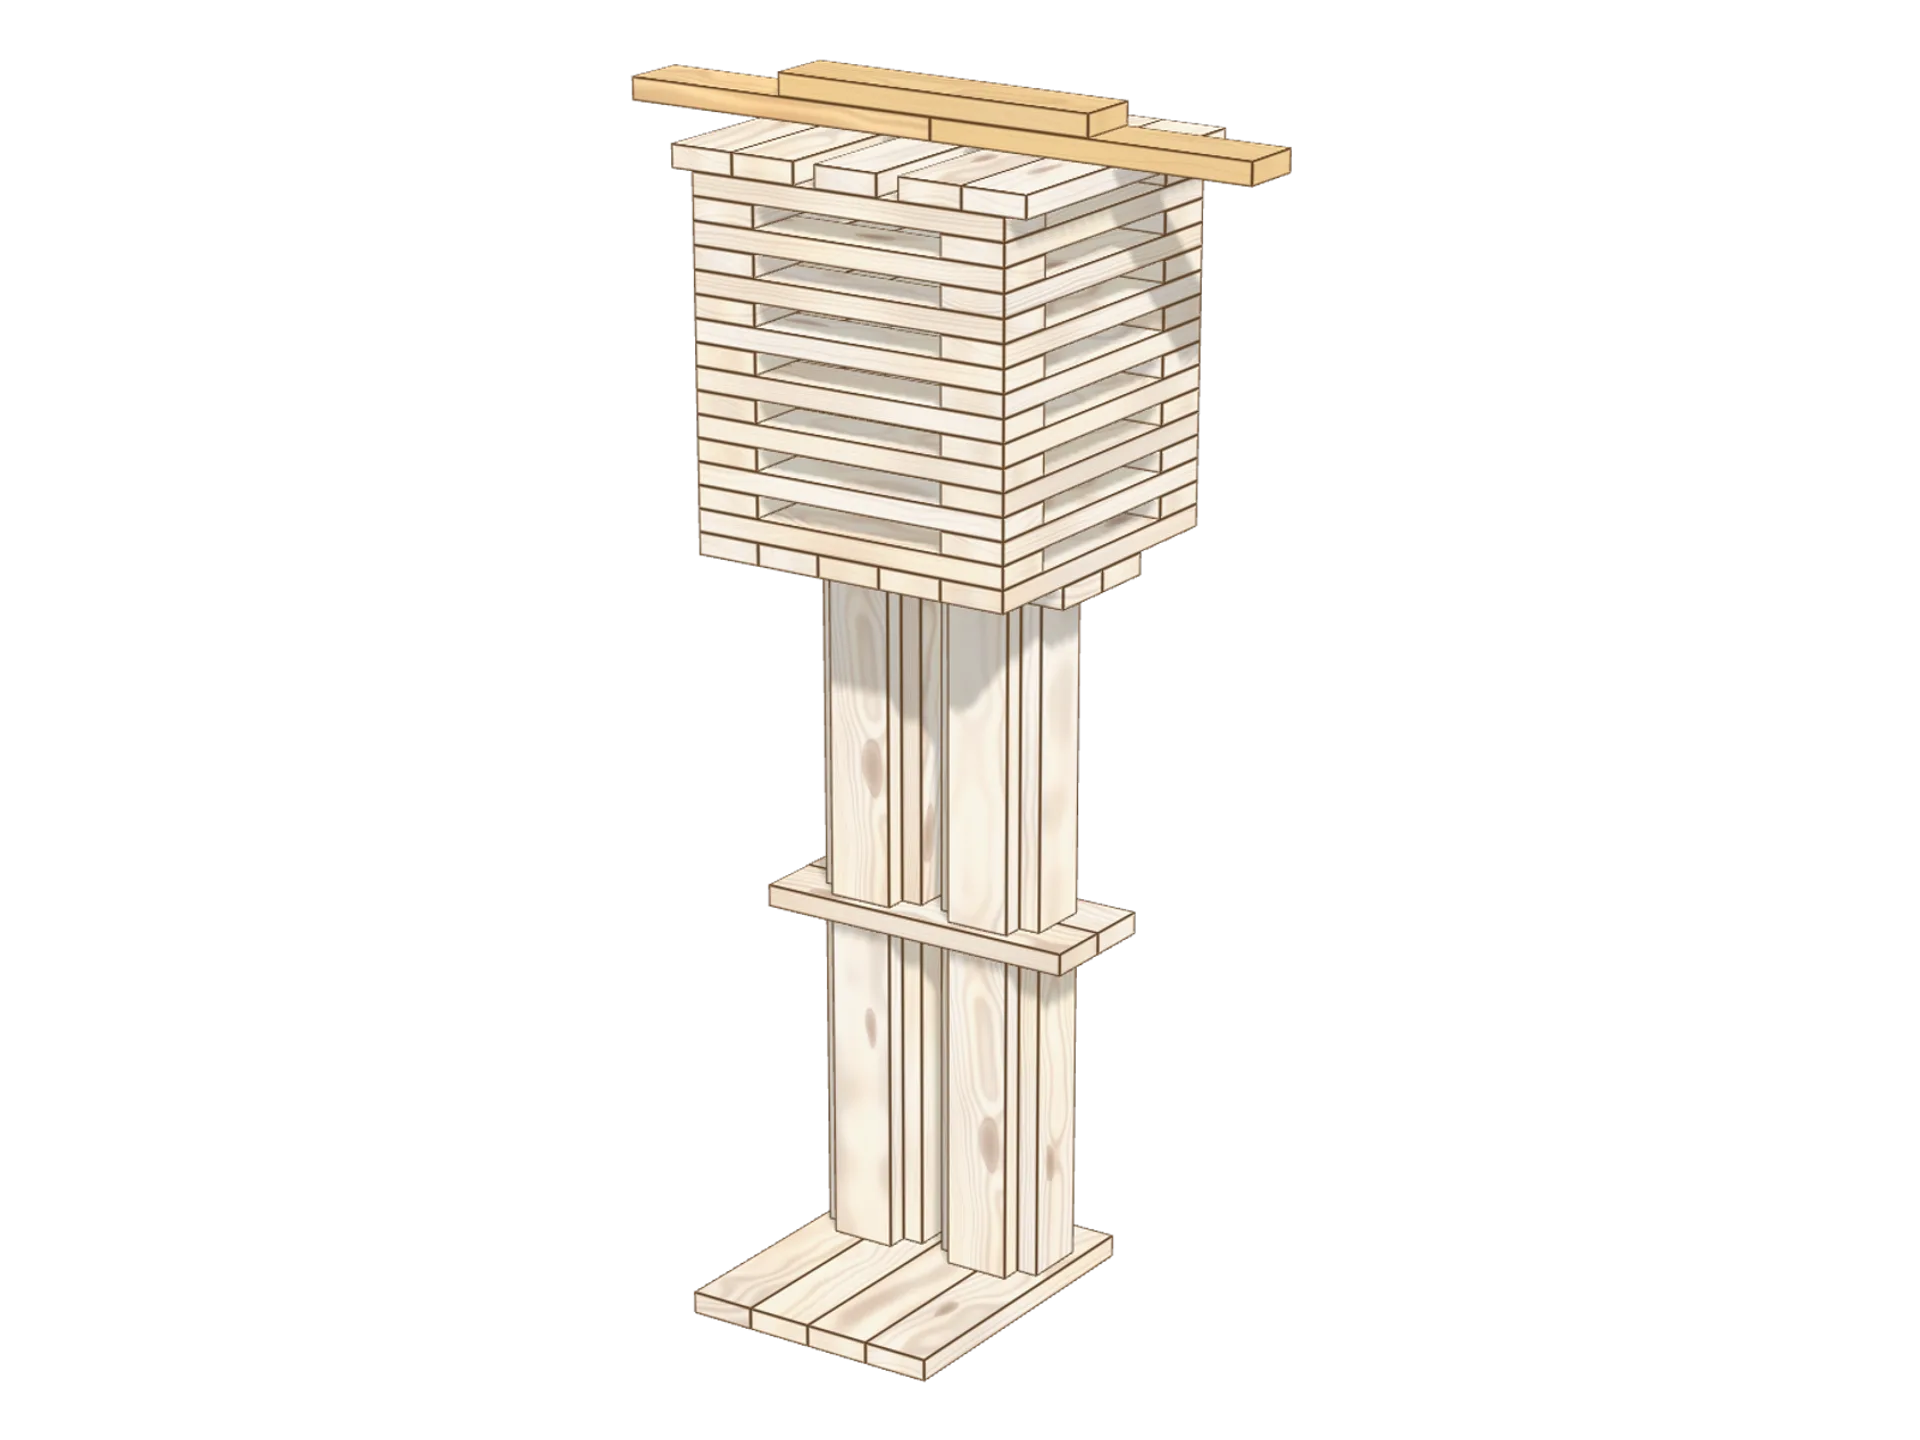
Step 9: start the arm beam
Lay 2 planks flat end to end across the shoulders, then 1 in the middle on top. This starts the arm beam, built like a brick wall.
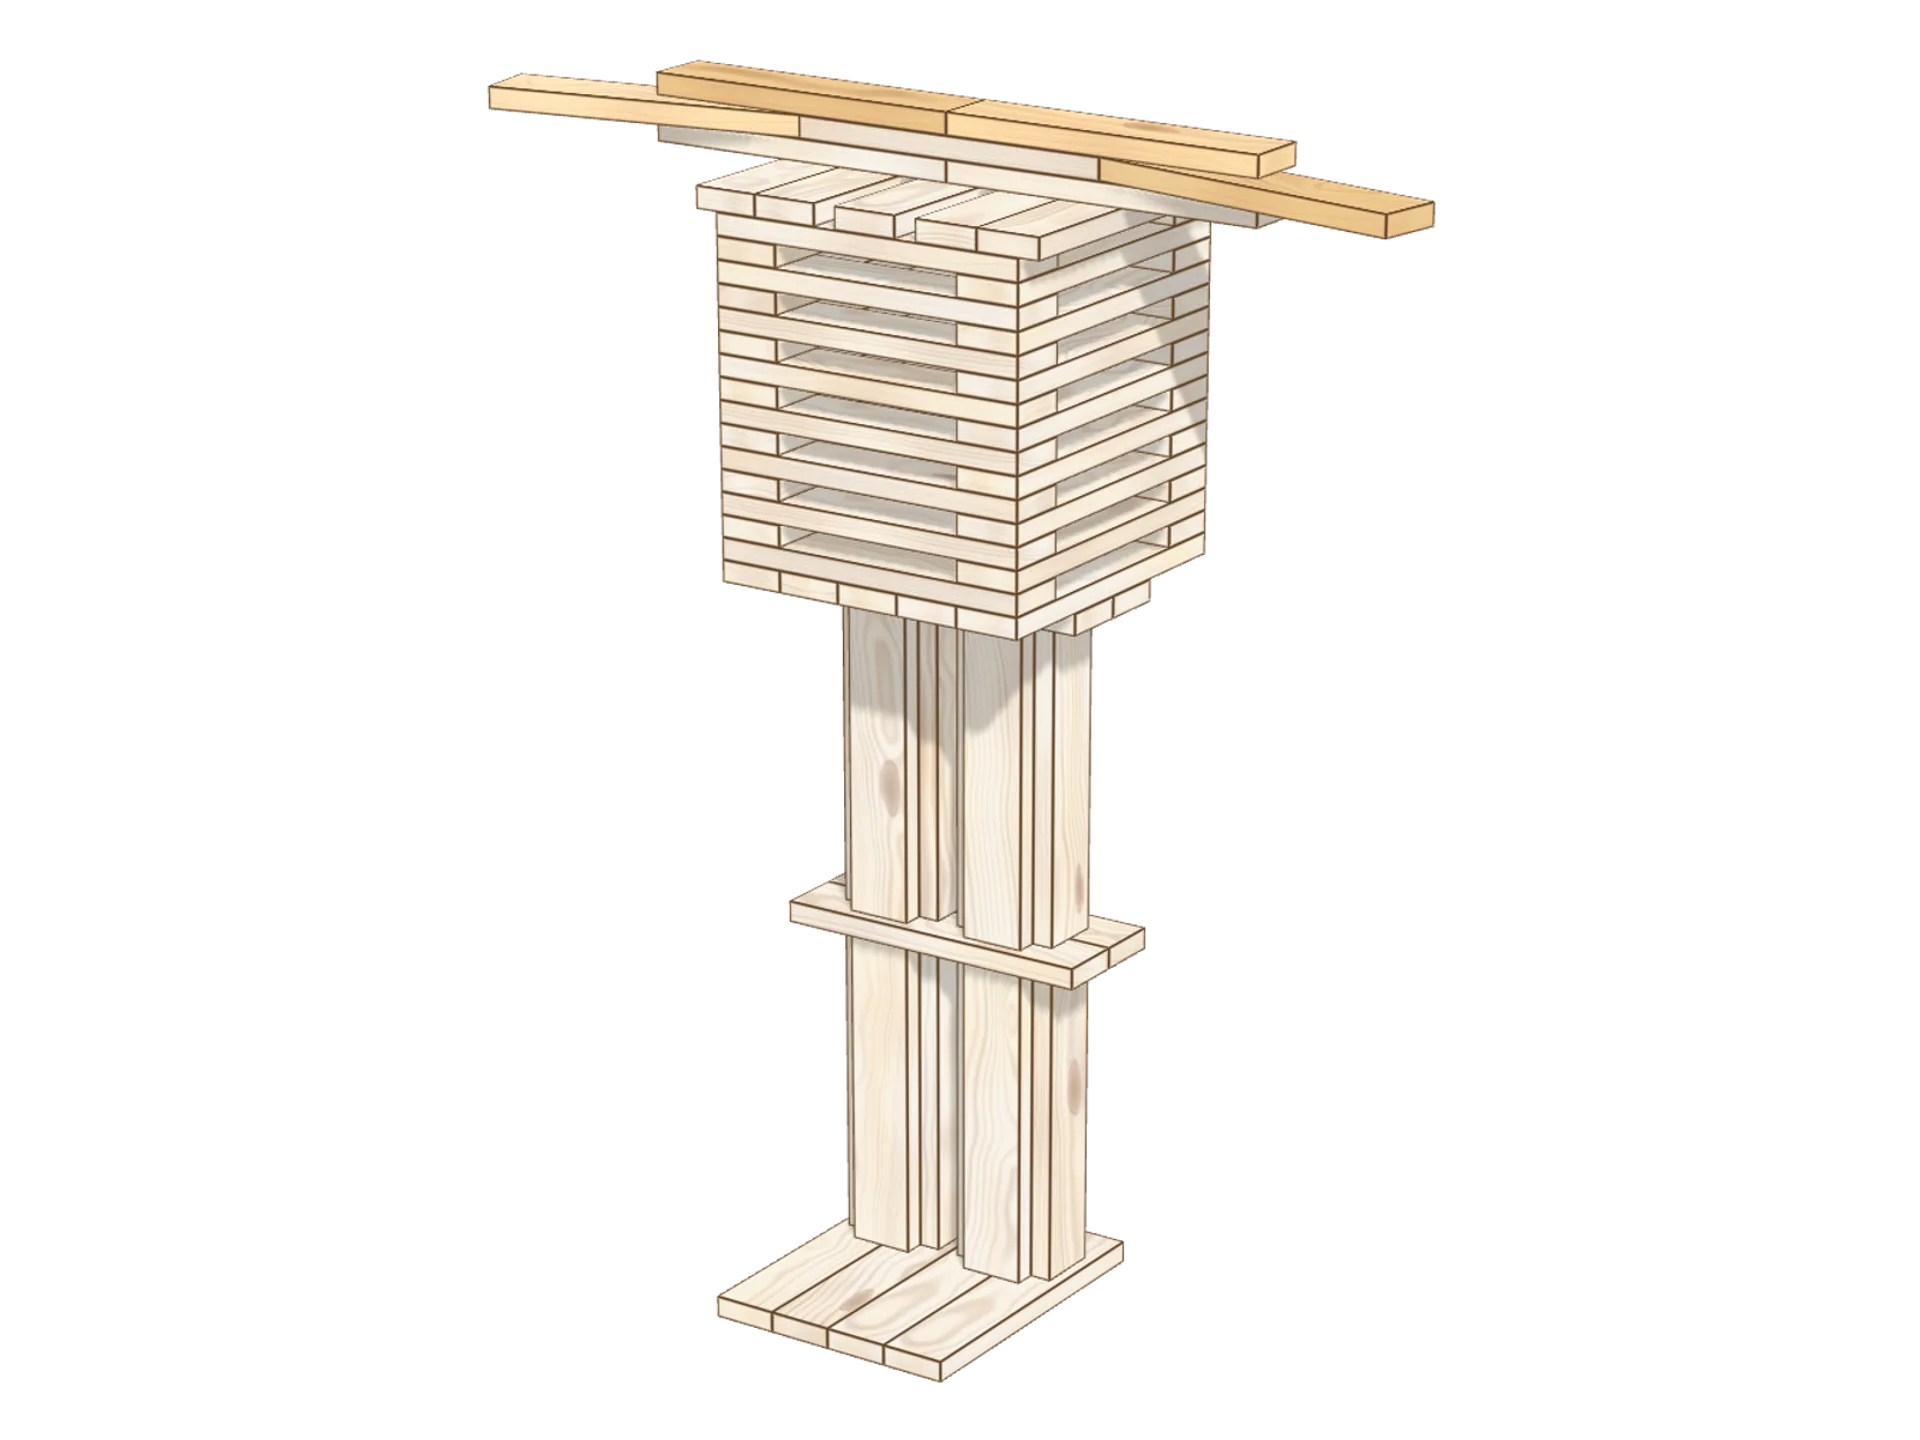
Step 10: place the elbows
On each side, lay a Kapla at the end of the row, turned slightly forward. It sticks out into the air: hold it with a finger and lay the plank that covers it straight away.
💡 Tip: on its own, the elbow tips over. Once covered it is held: only let go when the plank on top is in place.
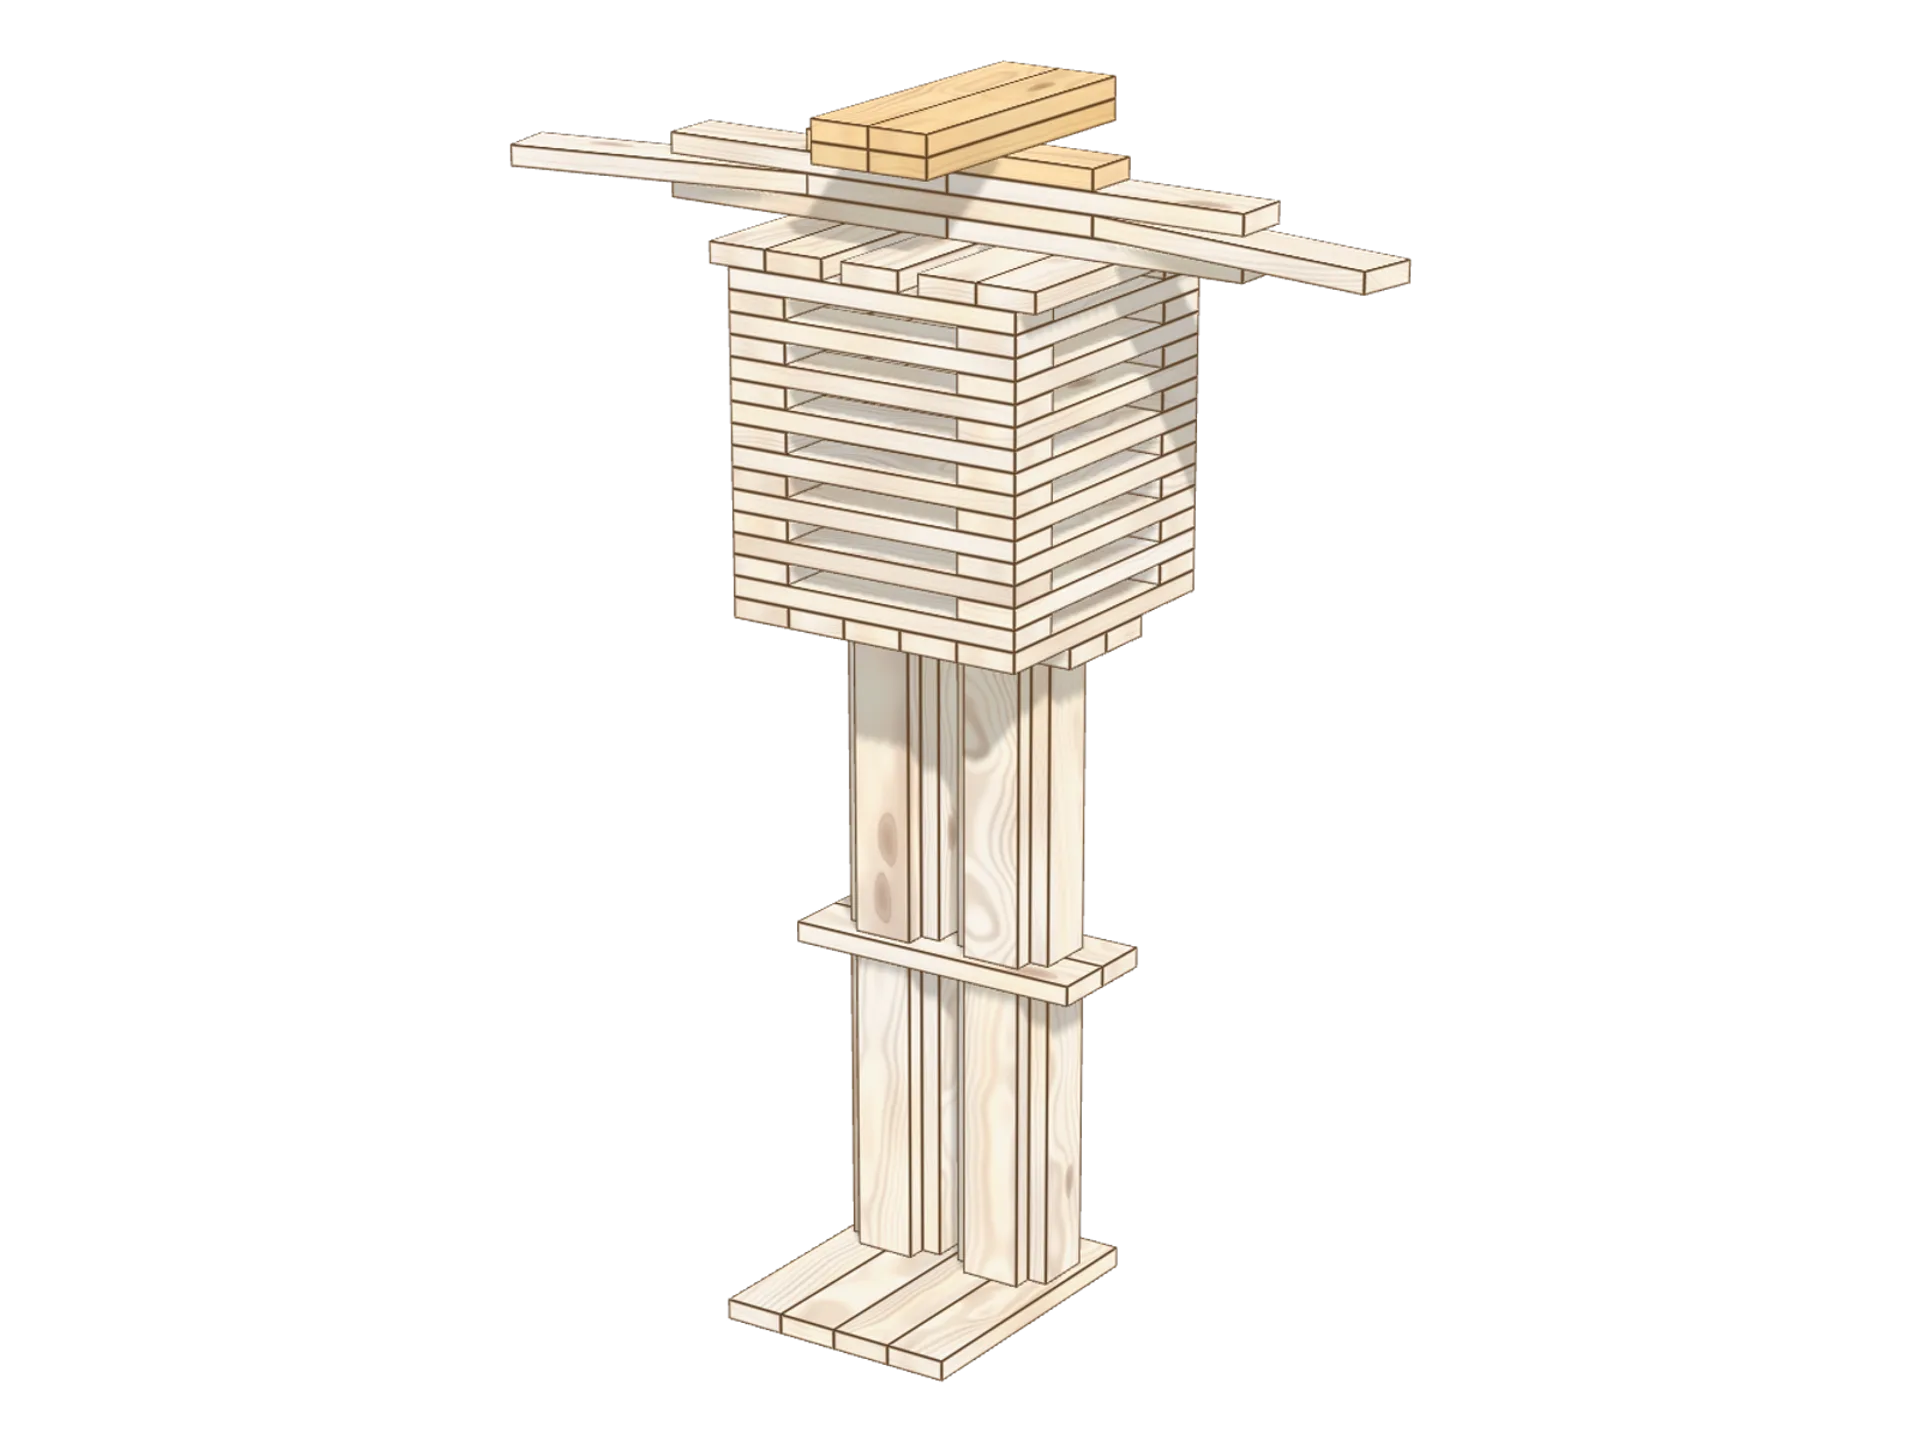
Step 11: the neck
Lay 1 plank in the middle of the beam, then 2 pairs of Kapla flat across it for the neck. Its weight presses on the middle of the arms: it is the counterweight that keeps them up.
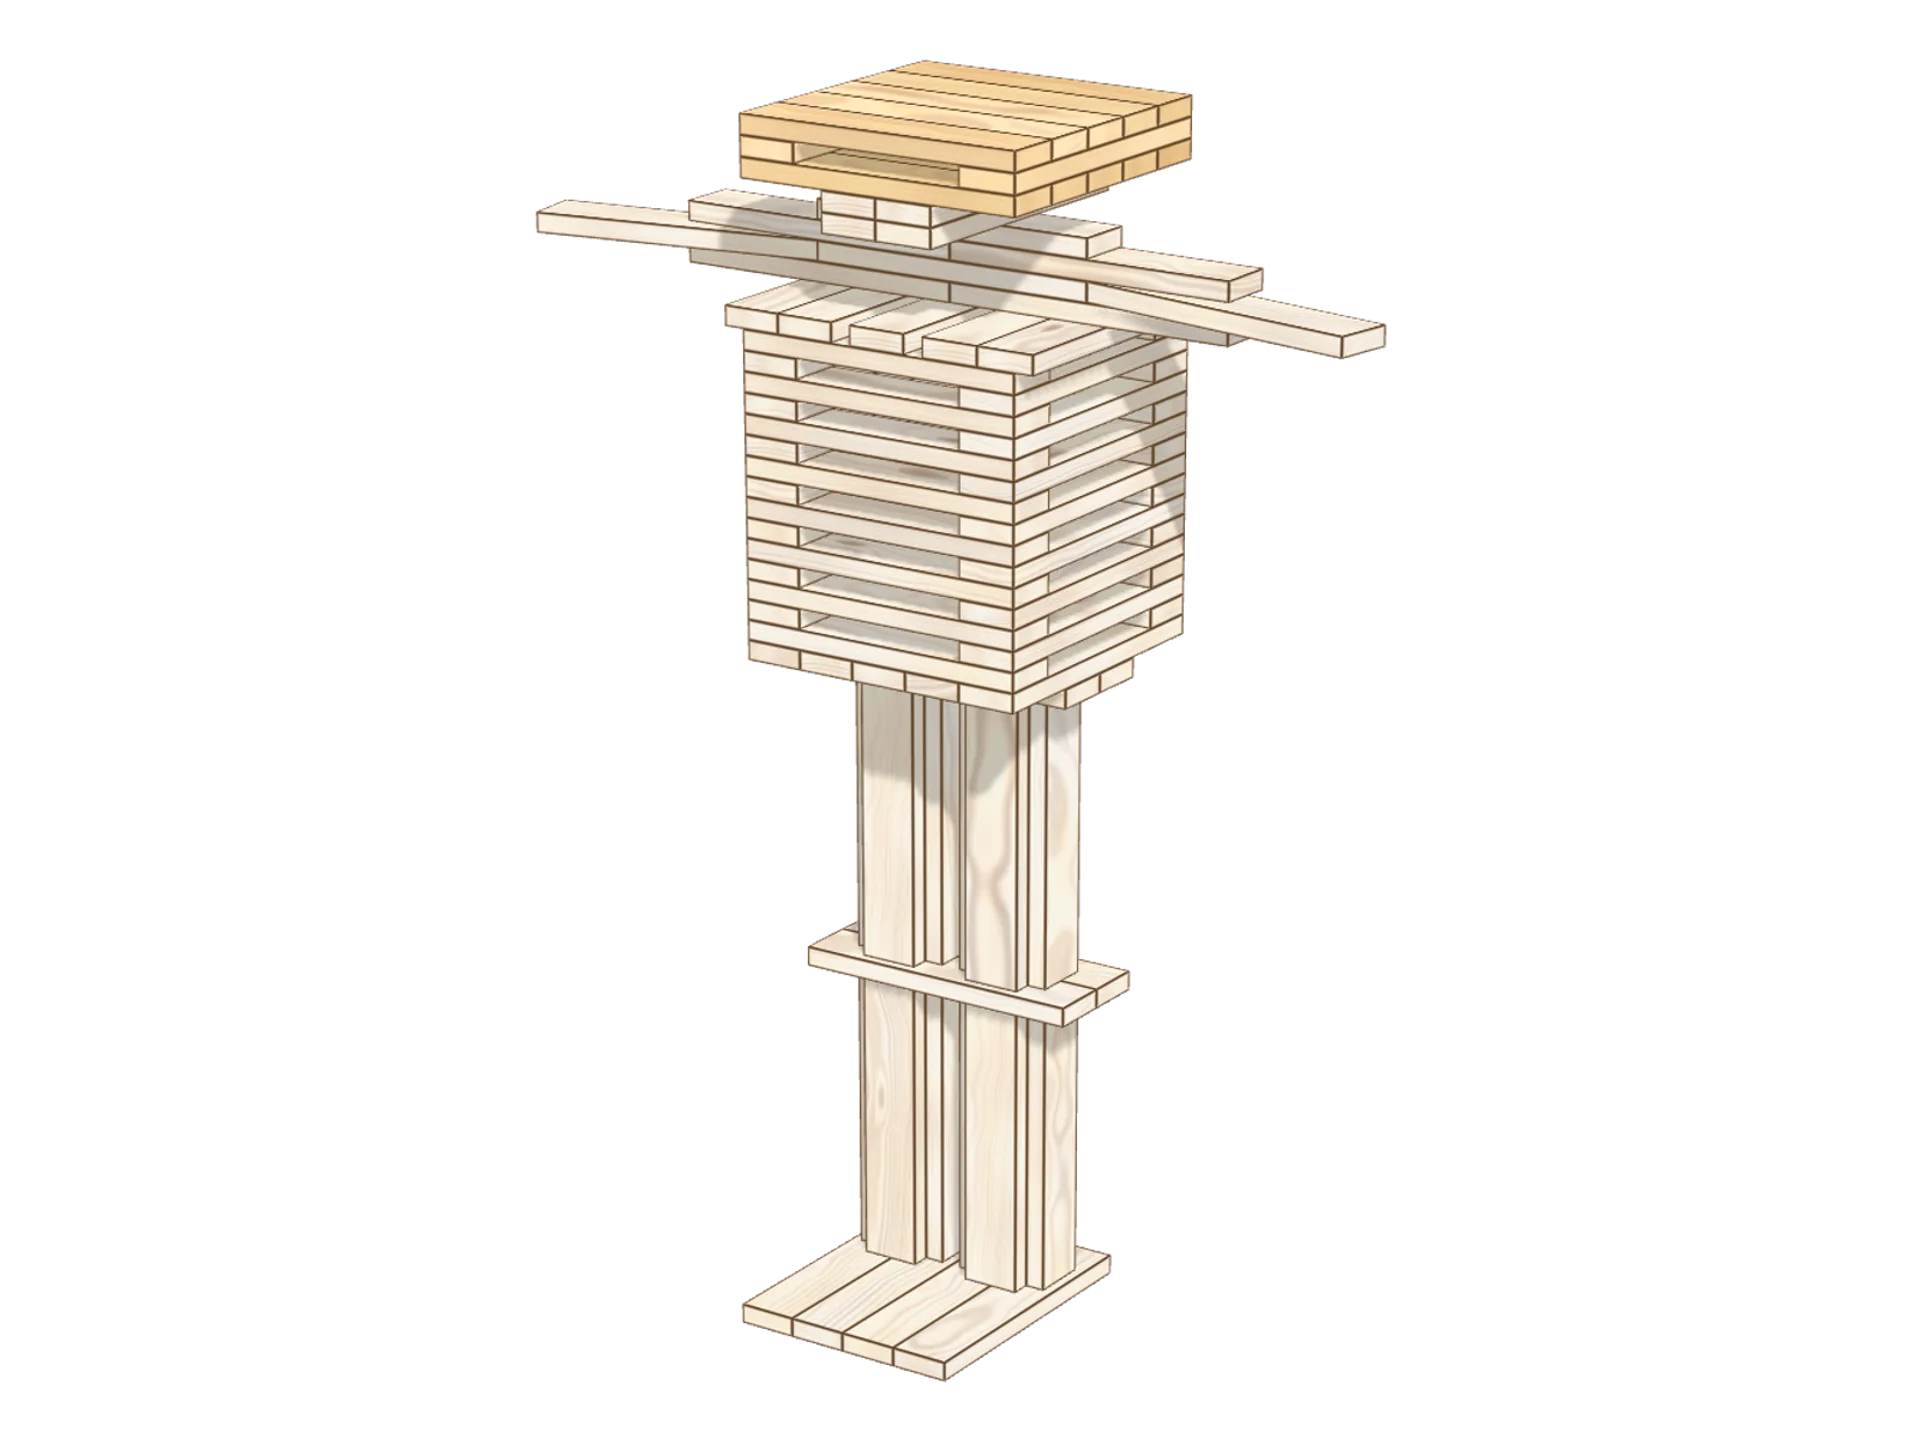
Step 12: the chin and the mouth
Lay 5 planks flat side by side, then 2 on the sides, leaving a gap in the middle: that is the mouth. Close it with 5 flat planks.
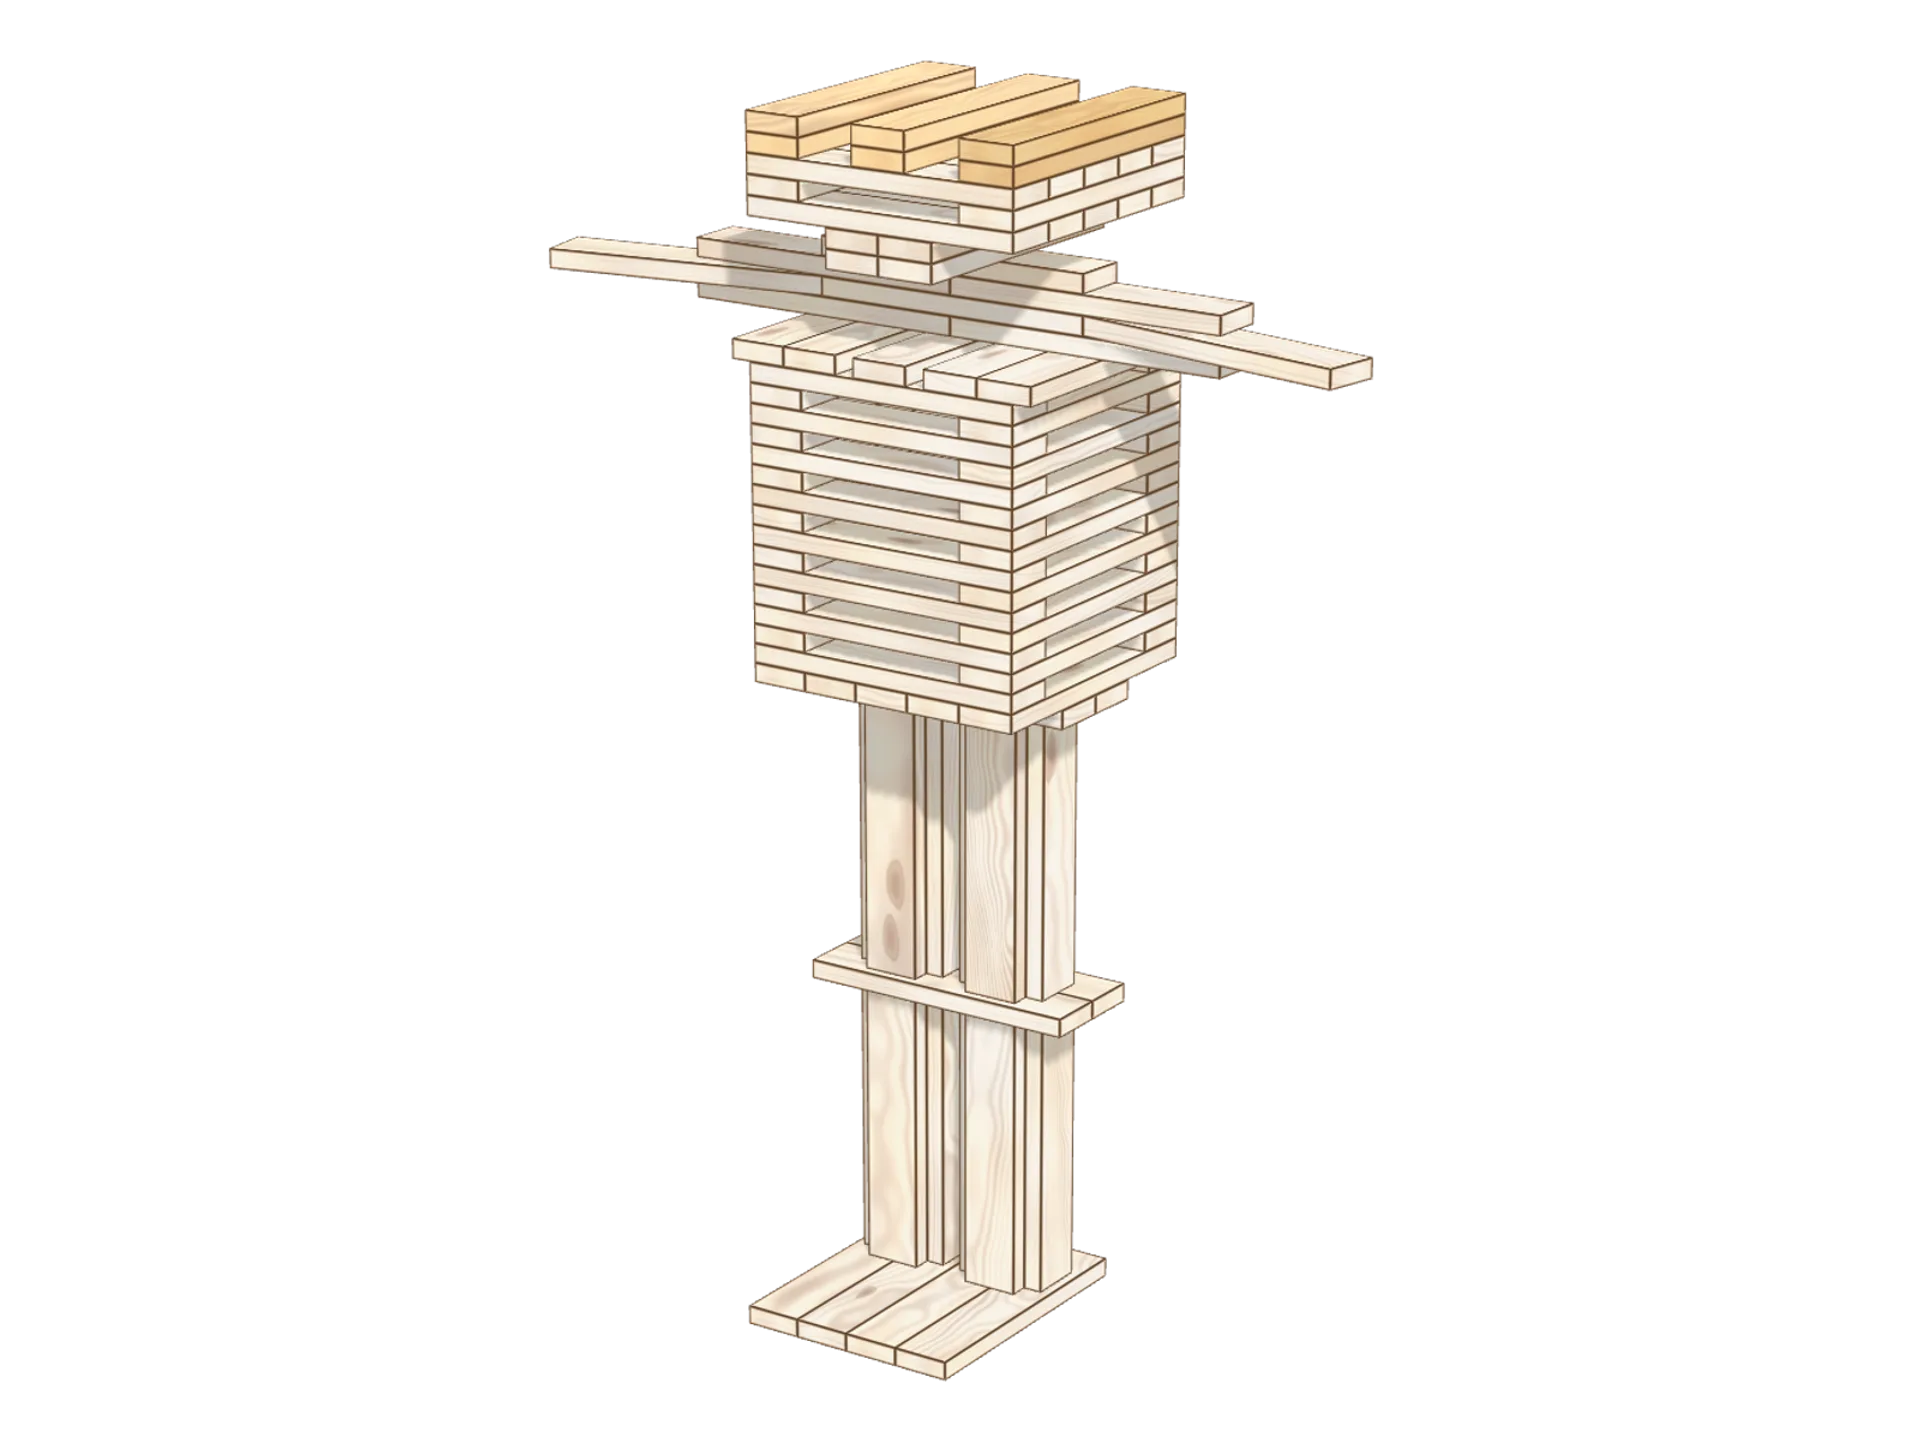
Step 13: the eyes
Lay 3 Kapla flat with 2 gaps between them: these are the eyes. Repeat a row of 3 just above so they are wide open.
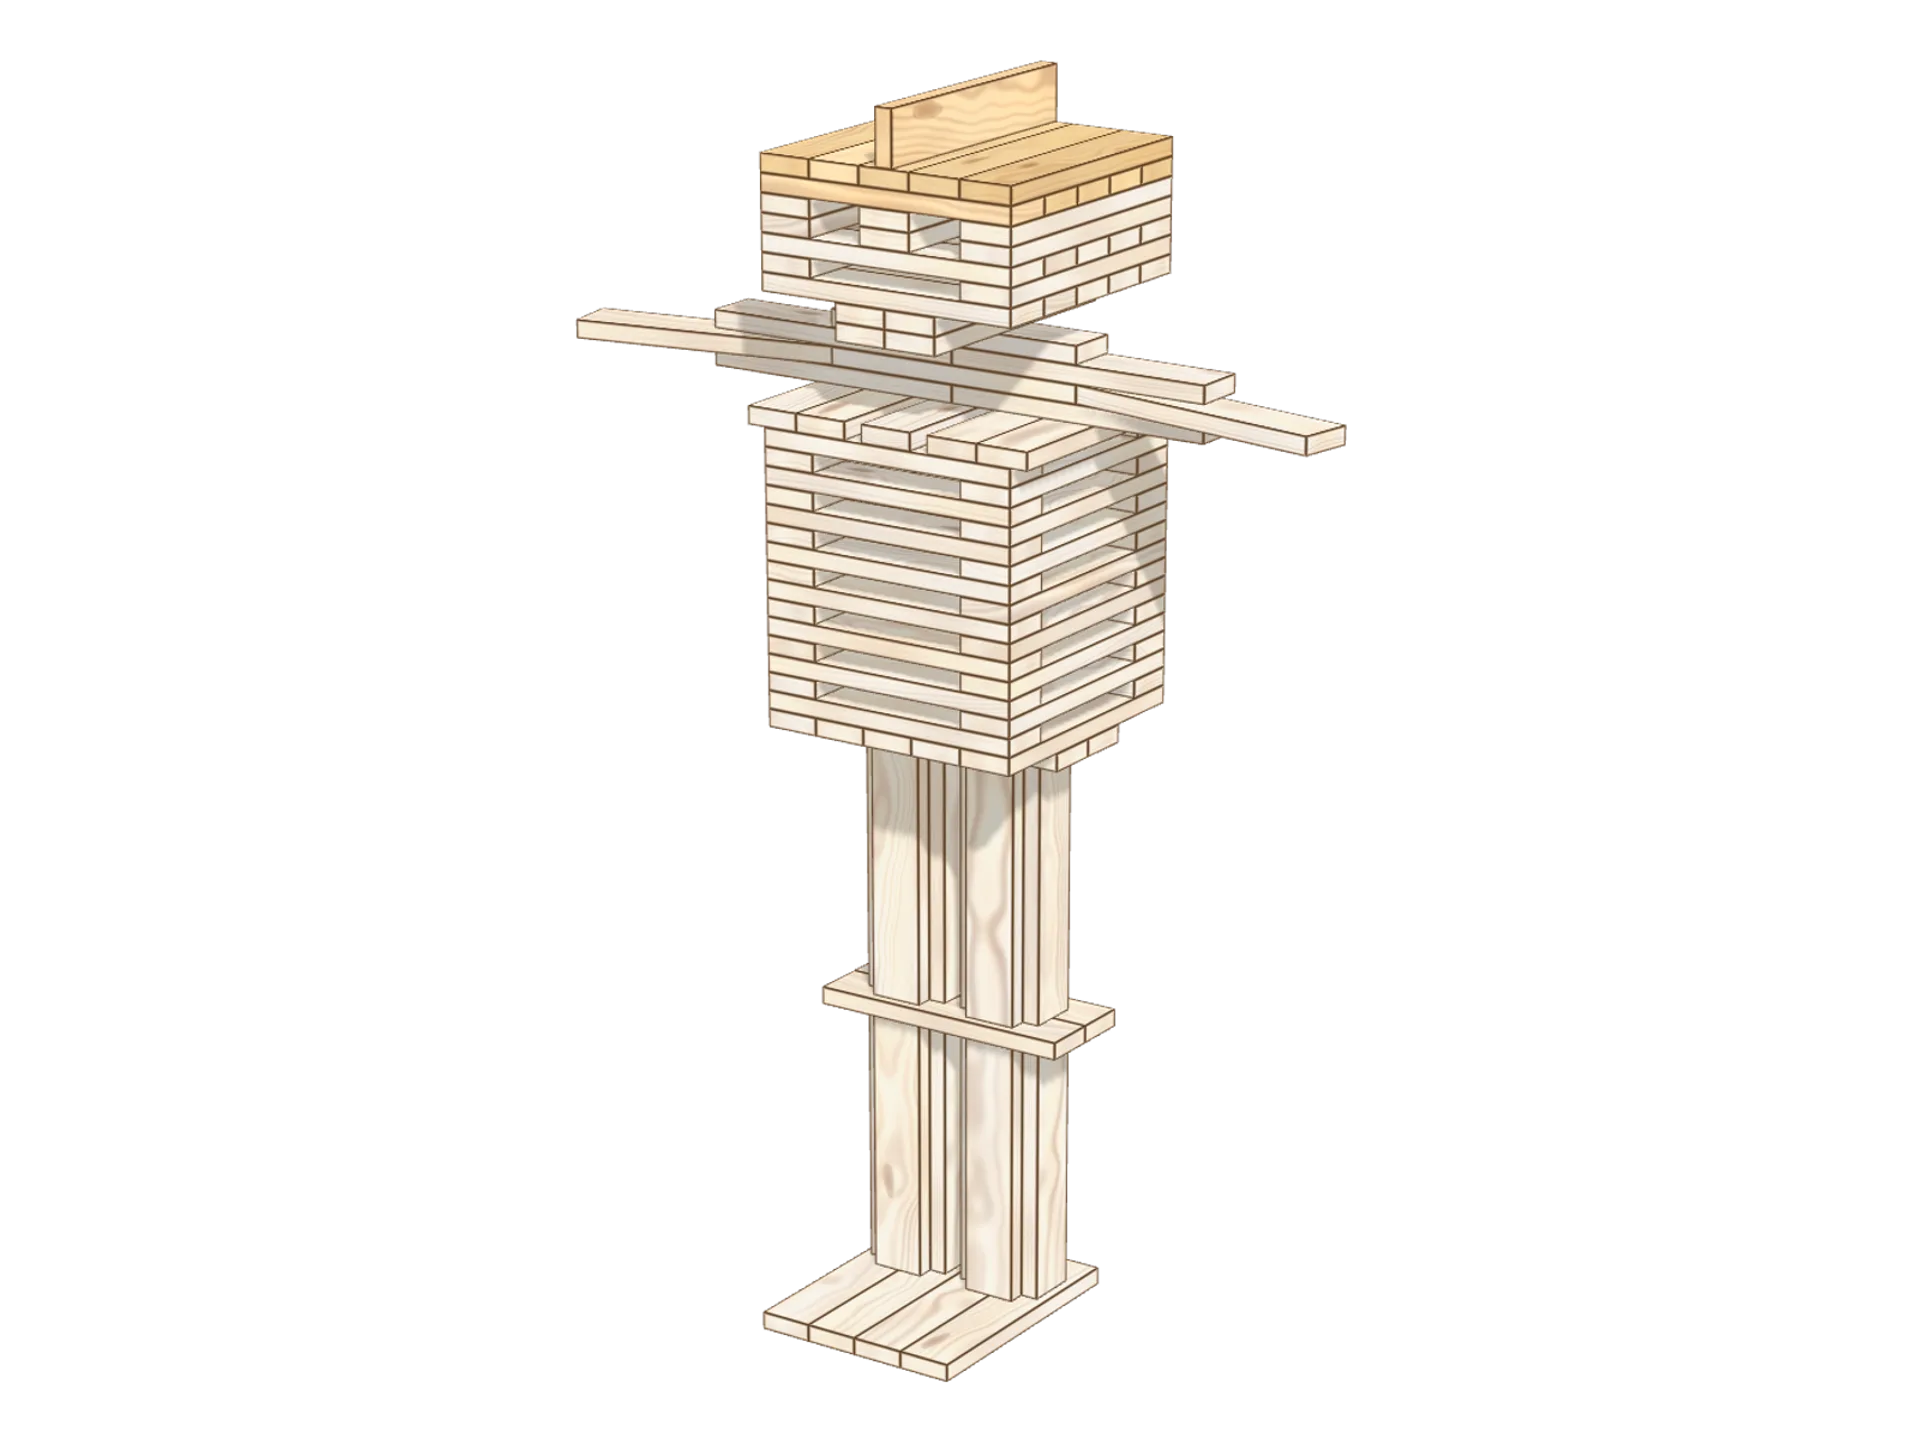
Step 14: the top of the head
Cover the head with 5 planks, then 5 more across them. Stand one last Kapla on edge at the very top: it is the robot’s antenna.
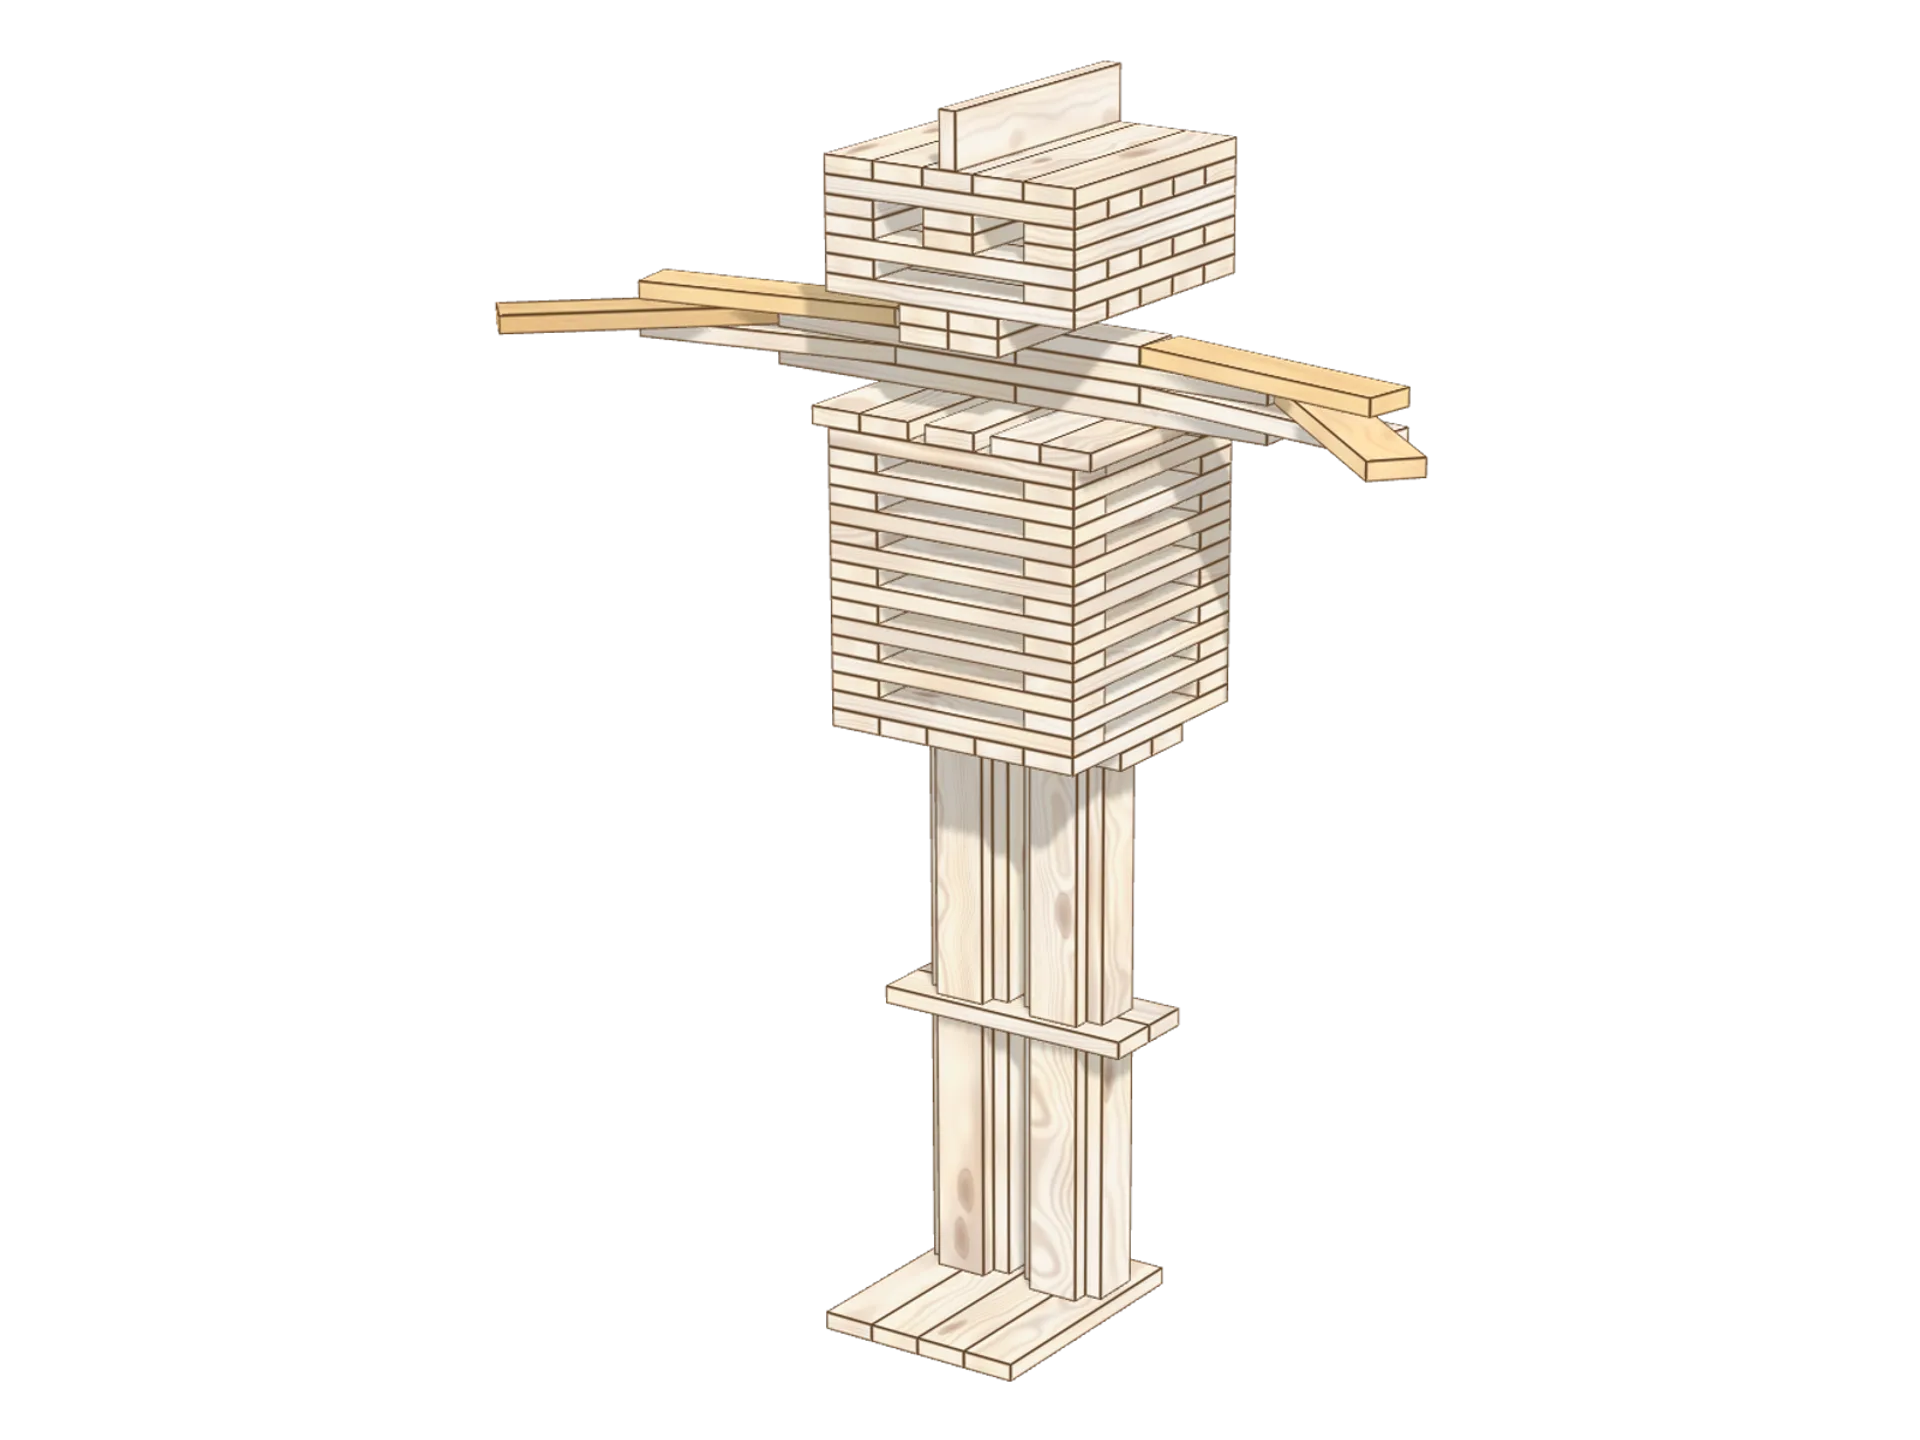
Step 15: the hands
At the end of each arm, lay a hand turned well forward and hold it while you lay the plank that covers it. Your robot is reaching out to you!
💡 Tip: lay the hands last: the head must already weigh on the beam to hold them.
Frequently asked questions
It takes 109: 24 for the feet and legs, 40 for the hips, body and shoulders, 11 for the arms and 34 for the neck and head.
The end of an arm never stands on its own: it sticks out into the air. Hold it with a finger and lay the plank that covers it straight away. And lay the hands last, once the head is on: its weight holds the arms.
From age 8. The legs, body and head can be built alone. For the elbows and hands, a second pair of hands helps: one holds, the other lays.
More Kapla models and building ideas!
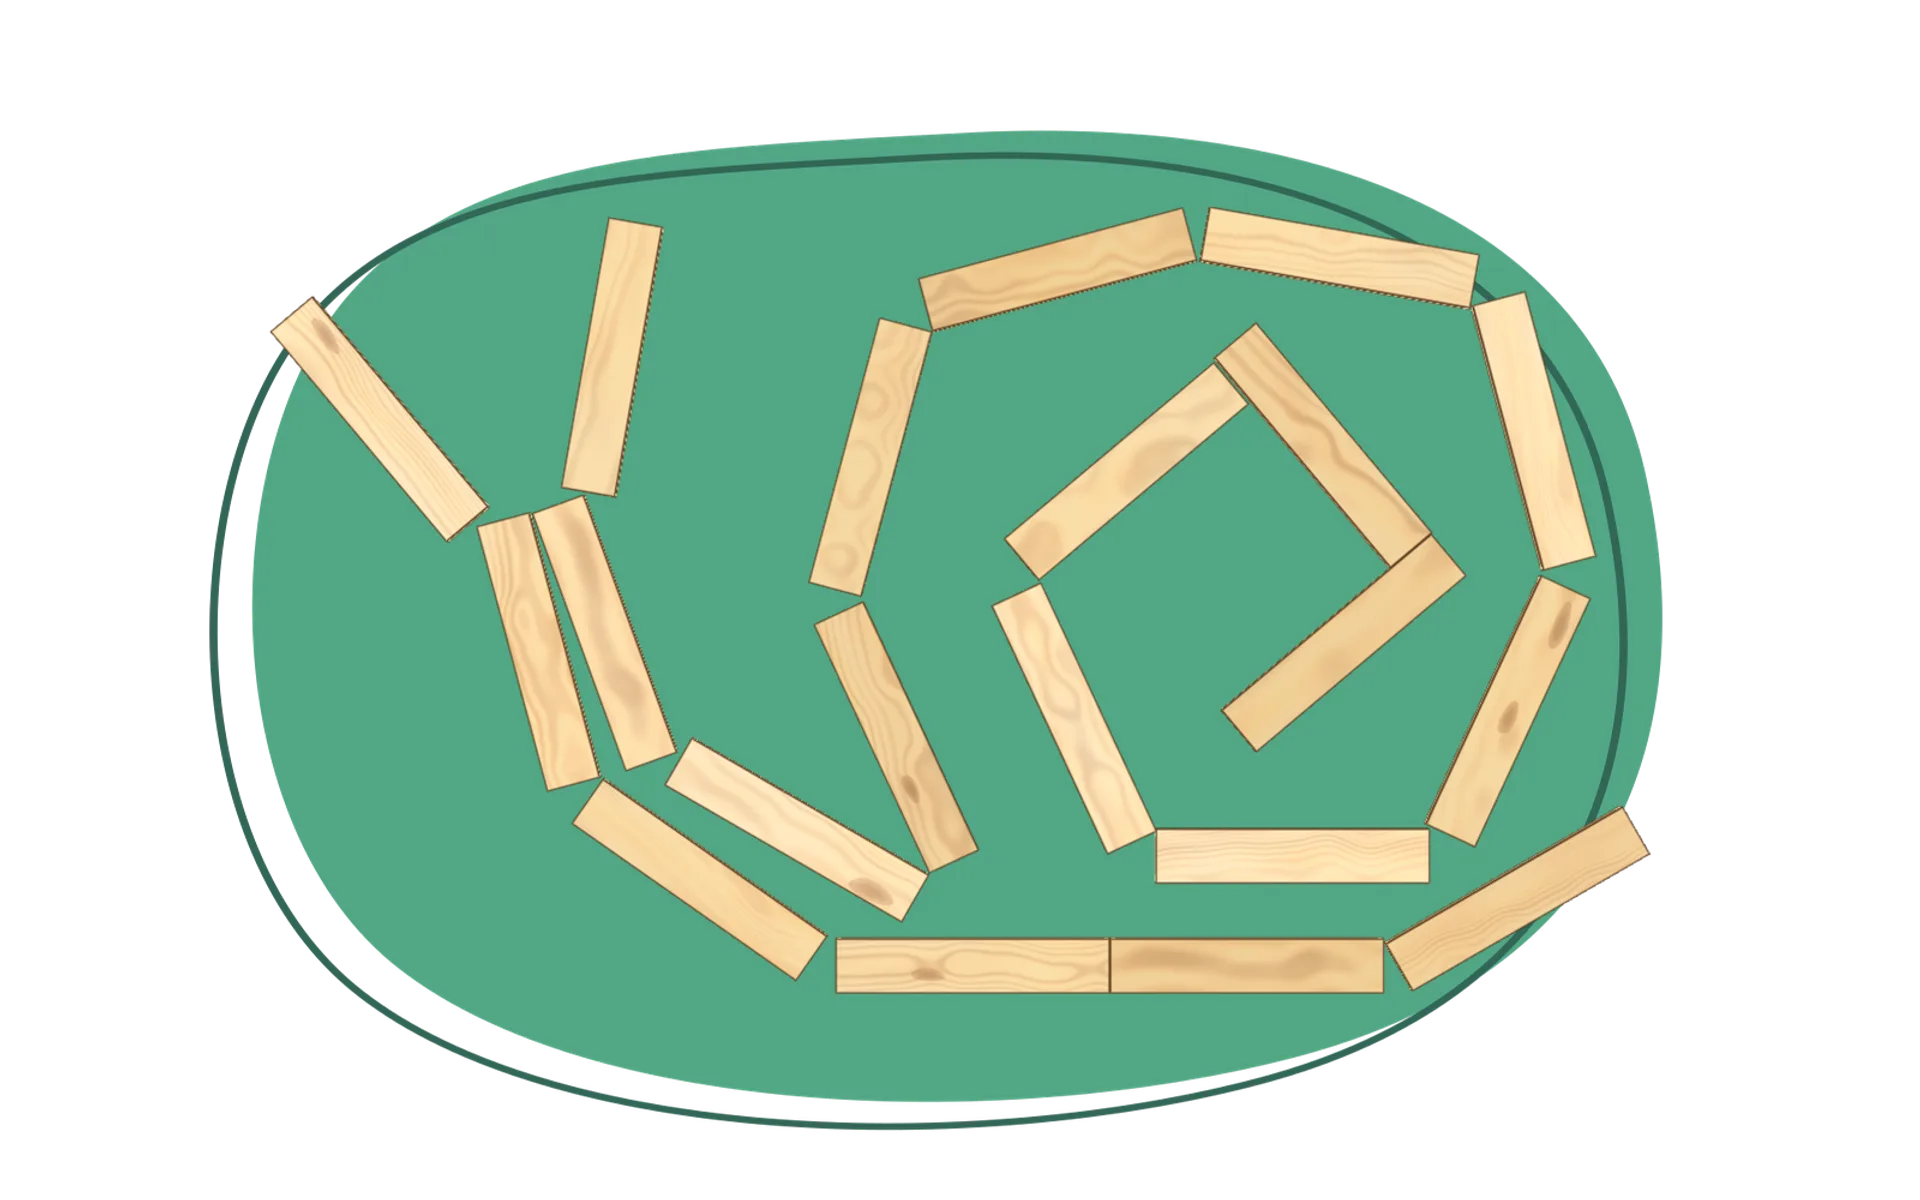
Snail
A flat snail: a long body, a raised neck, two antennae and a spiral shell.
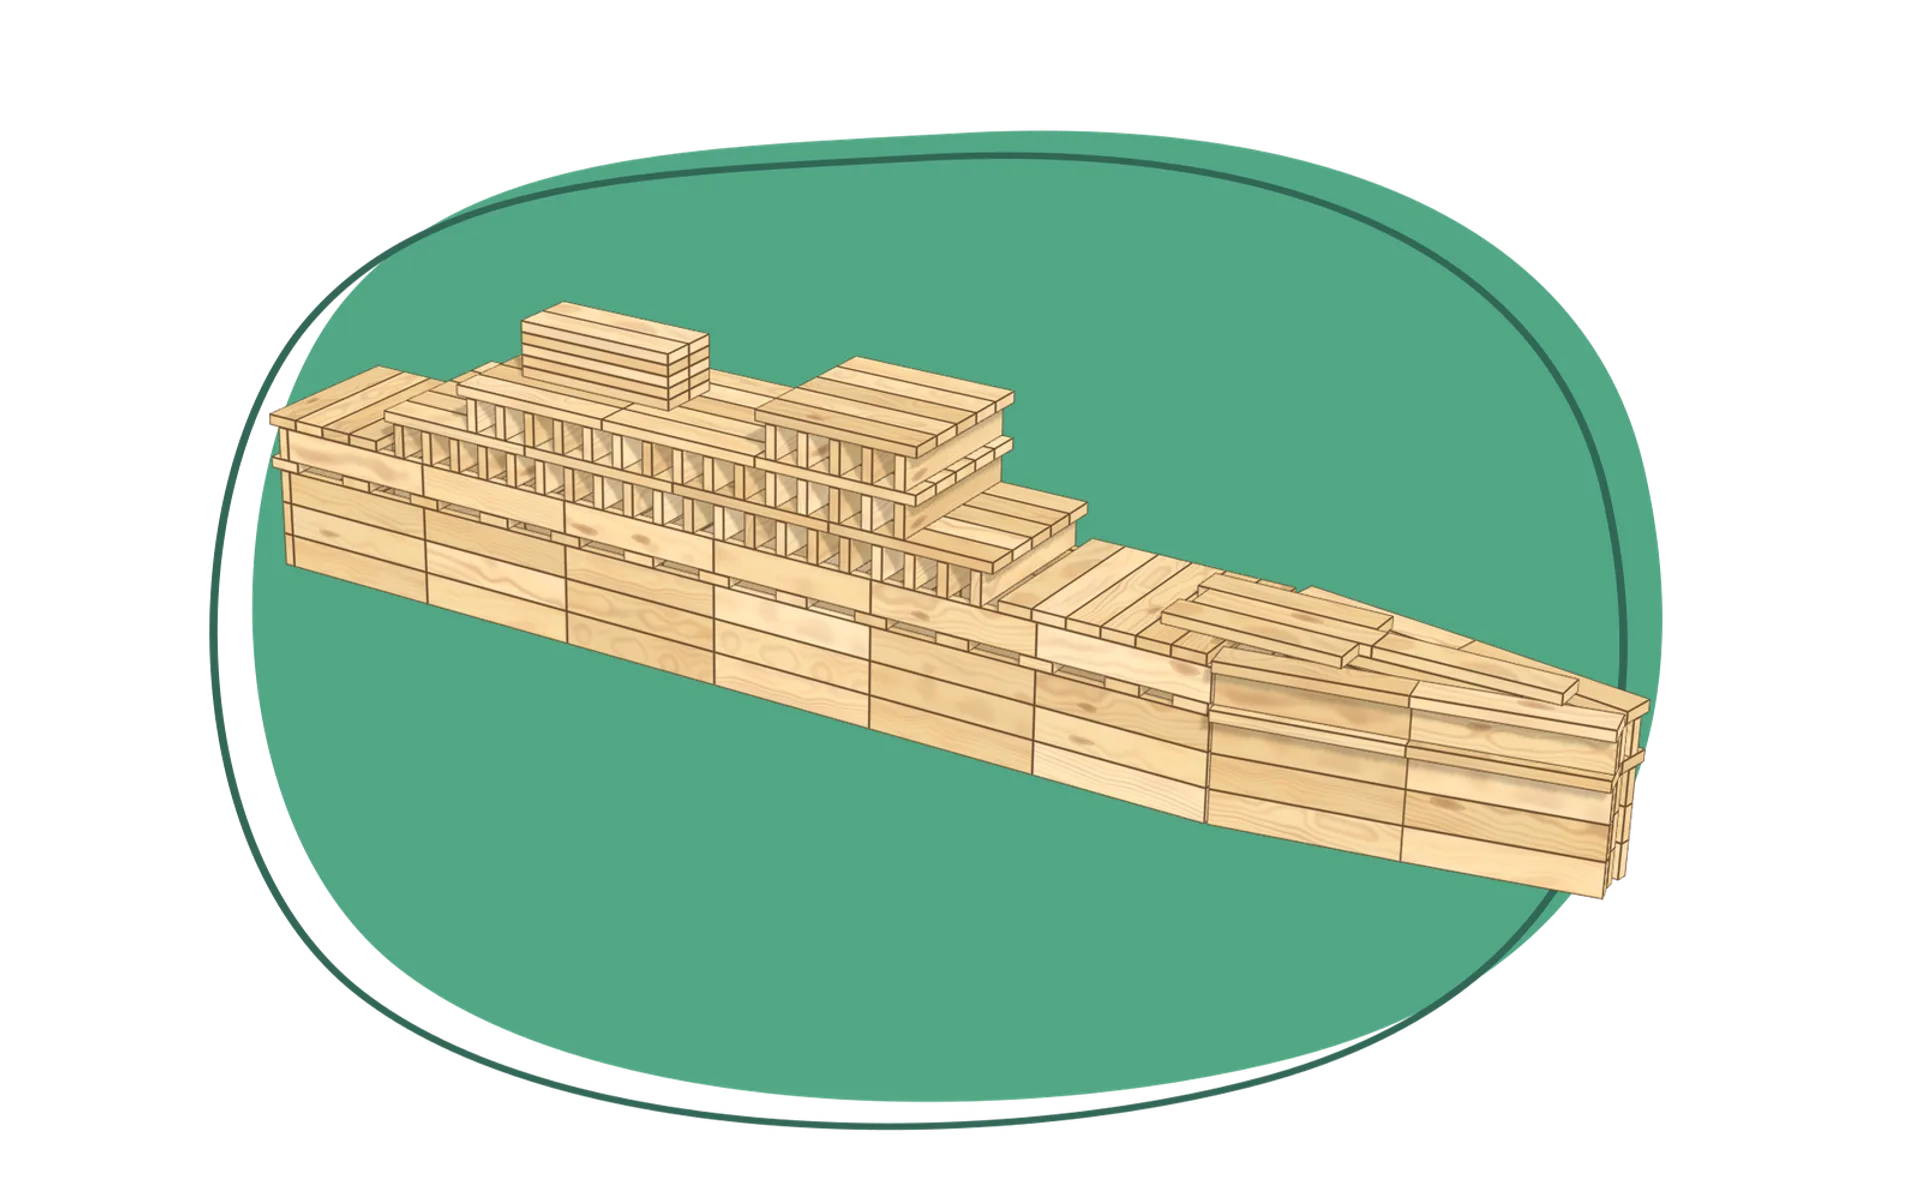
Ferry
Build a big Kapla ferry, in natural wood or in colours, with its pointed bow, its decks of windows for the passengers, the captain’s bridge and its funnel! This hard model takes precision and lots of Kapla.
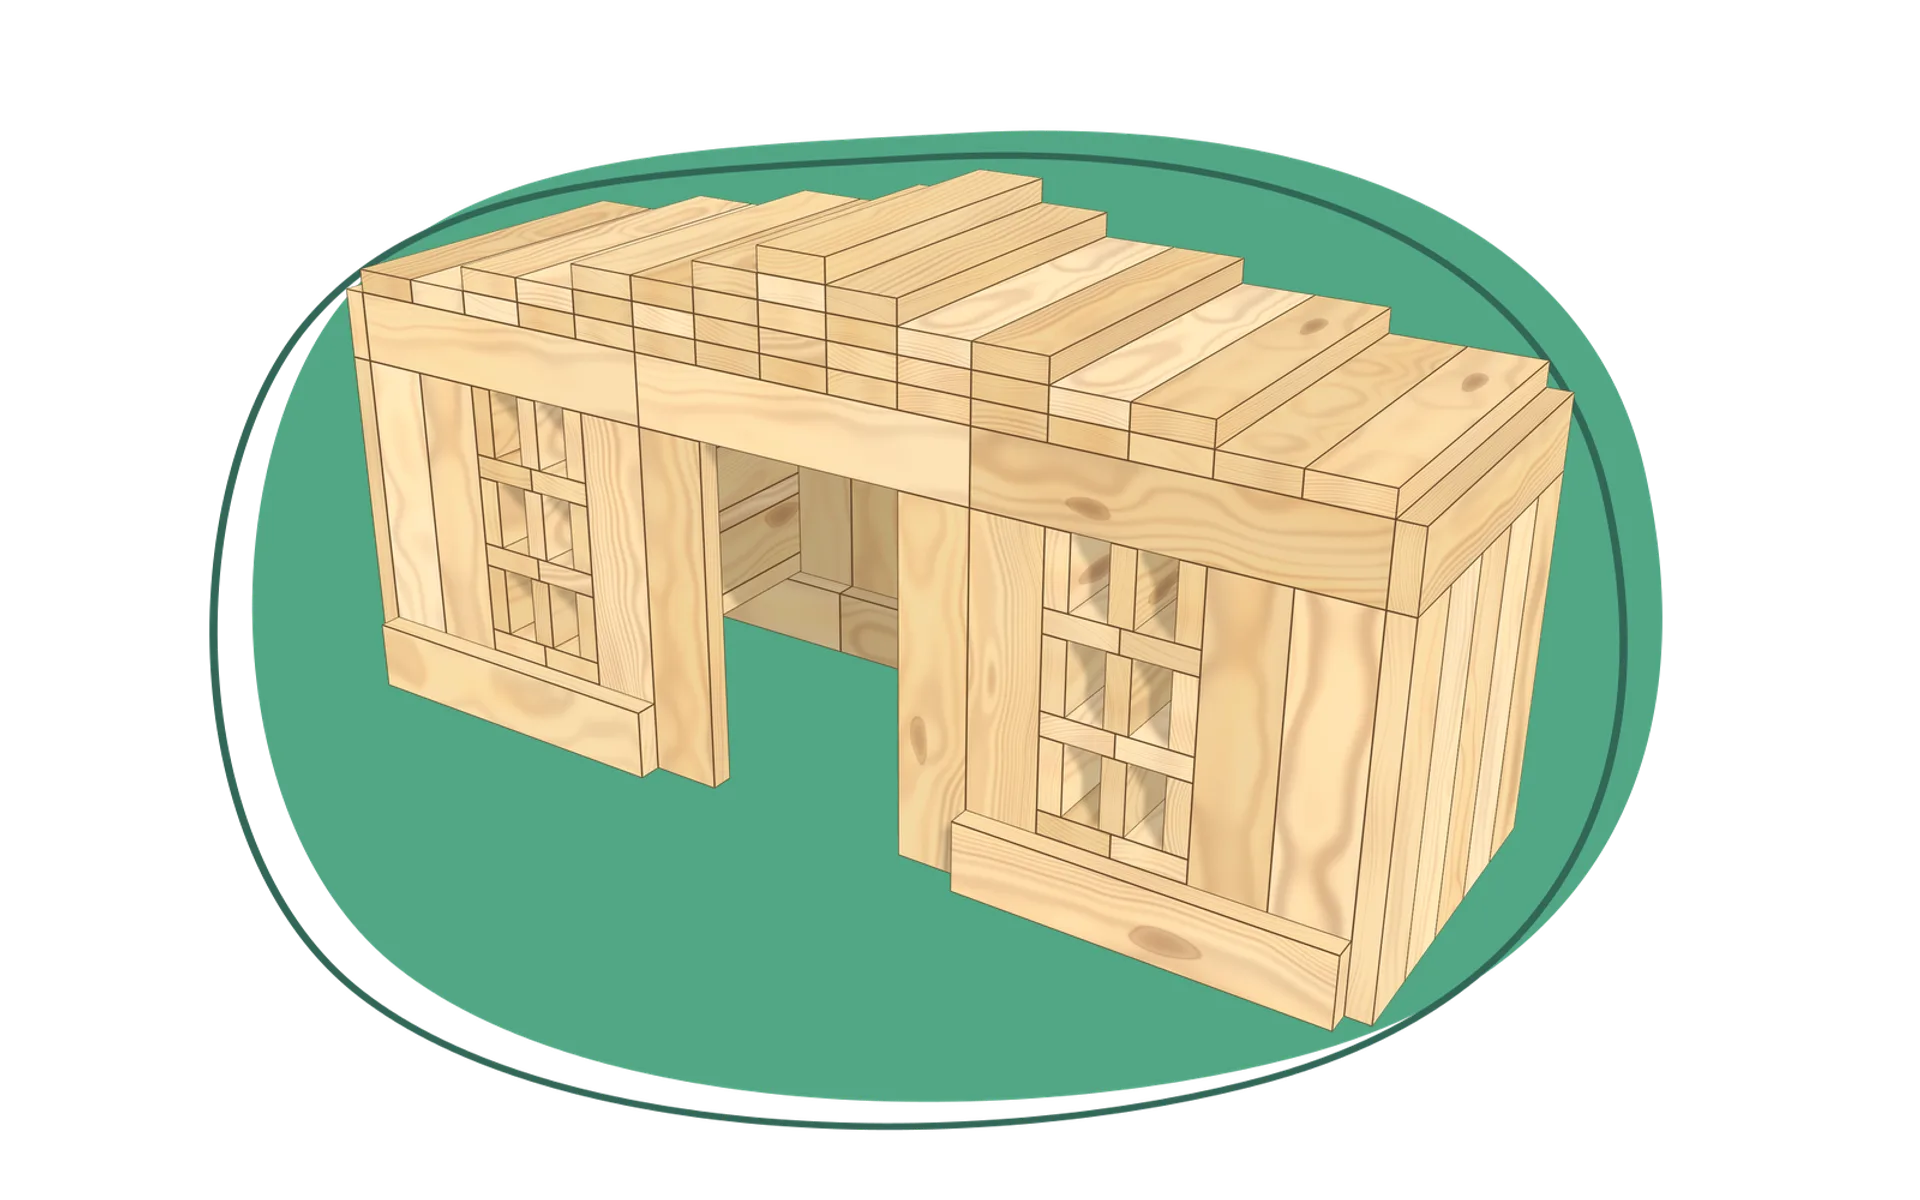
House
A house to live in, with a doorway at ground level and two windows with small panes.
Comments
No comments yet. Start the conversation!